Lecture: The Kajal Kaleidoscope: Mastering Maximum Impact & Waterproof Wear on Upper & Lower Lash Lines
(Professor Kajalina Winkleton, PhD, Esthetics Extraordinaire, takes the stage, adjusting her oversized, gem-studded spectacles. A dramatic spotlight illuminates her.)
(🎤Echoing voice): Welcome, welcome, beauty aficionados, to Kajal 101! Today, we delve into the mesmerizing, the mysterious, the utterly magnificent… Kajal!
(Professor Winkleton beams, brandishing a sleek black kajal stick.)
Forget your basic liner; forget your wimpy pencils! Today, we’re unlocking the secrets to kajal dominance. We’re talking maximum impact, folks. We’re talking waterproof wear that can survive a Bollywood rain sequence. We’re talking about transforming your peepers into captivating portals to another dimension. 👁️👁️
So, grab your notebooks (or your iPads, I’m not a Luddite), and let’s get kajal-ing!
Lecture Outline:
I. Kajal: A History of Hypnotic Eyes (The ancient roots and modern renaissance)
II. The Kajal Kit: Essential Tools for a Masterpiece (Choosing the right kajal, brushes, and setting products)
III. The Upper Lash Line: Kajal as a Canvas (Techniques for tightlining, winged liner, and smoky eyes)
IV. The Lower Lash Line: Sultry Shadows & Subtle Definition (Application techniques for different eye shapes and desired effects)
V. Waterproof Warrior: Sealing the Deal (Top tips and products for long-lasting, smudge-proof wear)
VI. Troubleshooting: Kajal Calamities and Their Cures (Common mistakes and how to avoid them)
VII. Kajal Creativity: Beyond the Basics (Exploring colorful kajals, graphic liner, and avant-garde looks)
VIII. Q&A: Ask Professor Kajalina! (Your chance to unleash your burning kajal questions)
I. Kajal: A History of Hypnotic Eyes
(Professor Winkleton clears her throat, adjusting her microphone.)
Alright class, let’s rewind the clock… way back! Kajal, my dears, isn’t some trendy new TikTok craze. It’s an ancient beauty ritual, steeped in history and tradition. We’re talking thousands of years, dating back to ancient Egypt and the Middle East! 🇪🇬🐪
Imagine Cleopatra, not just ruling a kingdom, but rocking a killer kajal look that could stop a chariot in its tracks! This wasn’t just for vanity, mind you. Kajal was originally formulated with ingredients like soot, herbs, and oils, believed to protect the eyes from the harsh sun, dust, and even evil spirits. (Who knew your eyeliner could ward off demons?)
(Professor Winkleton winks.)
Over the centuries, kajal has evolved, but its essence remains the same: to define, enhance, and protect the eyes. Today, we have a plethora of formulations, from traditional powders to creamy sticks, all designed to deliver that signature intense pigmentation and long-lasting wear.
Key Takeaways:
- Ancient Origins: Kajal has been used for millennia for beauty and protection.
- Cultural Significance: It holds a prominent place in many cultures around the world.
- Modern Evolution: Formulations have improved for better wear and safety.
II. The Kajal Kit: Essential Tools for a Masterpiece
(Professor Winkleton unveils a dazzling array of kajal products.)
Now, let’s talk tools! You wouldn’t try to paint the Mona Lisa with a crayon, would you? (Well, maybe some of you would… but I digress!) To achieve kajal perfection, you need the right arsenal.
A. Choosing Your Kajal:
- Texture is Key: Kajals come in various textures – powders, creams, pencils, even gels! Consider your skin type and desired finish. Oily lids? Opt for a drier formula. Dry skin? A creamy kajal might be your best friend.
- Pigmentation Power: Look for a kajal that boasts intense color payoff. One swipe should deliver a deep, rich black (or whichever shade your heart desires!). Don’t settle for a wishy-washy grey!
- Staying Power: The holy grail! A good kajal should last for hours without smudging or fading. Waterproof and long-wearing formulas are your allies here.
B. Brushes & Blending:
- Angled Brush: Perfect for precise application along the lash line and creating sharp wings. Think of it as your kajal calligraphy pen. 🖋️
- Smudge Brush: Ideal for softening harsh lines and creating a smoky effect. It’s the secret weapon for that effortlessly sultry look.
- Eyeliner Brush: A thin, pointed brush can be used for detailed work and tightlining.
C. Setting the Stage:
- Eyeshadow Primer: A MUST! This creates a smooth canvas for your kajal, prevents creasing, and enhances its staying power. Think of it as the foundation for your eye makeup masterpiece.
- Setting Powder: A light dusting of translucent powder over your kajal can help to lock it in place and prevent smudging.
- Setting Spray: A final spritz of setting spray will further enhance the longevity of your look.
Table 1: Kajal Kit Essentials
| Item | Purpose | Recommendation |
|---|---|---|
| Kajal (Pencil/Cream) | Defining the eyes, creating smoky effects | Highly pigmented, long-wearing, waterproof formula. |
| Angled Brush | Precise liner application, creating wings | Synthetic bristles for easy cleaning and sharp lines. |
| Smudge Brush | Blending and softening lines, creating smoky eyes | Soft, dense bristles for effortless blending. |
| Eyeshadow Primer | Creating a smooth canvas, preventing creasing, enhancing longevity | Choose a primer that suits your skin type (oily, dry, combination). |
| Setting Powder | Locking in the kajal, preventing smudging | Translucent powder for a natural finish. |
| Setting Spray | Final touch for long-lasting wear | Choose a waterproof or long-lasting setting spray. |
III. The Upper Lash Line: Kajal as a Canvas
(Professor Winkleton picks up her angled brush with a flourish.)
Alright, let’s get to the fun part! The upper lash line is your kajal canvas. Here, you can create a multitude of looks, from subtle definition to dramatic wings.
A. Tightlining:
This technique involves applying kajal to the upper waterline (the area between your lashes and your eye). It instantly makes your lashes look fuller and your eyes more defined, without looking like you’re wearing a ton of makeup.
- Technique: Gently lift your upper eyelid and apply kajal to the waterline. Use a short, back-and-forth motion to ensure even coverage.
- Pro Tip: Start with a clean, dry waterline. Use a cotton swab to remove any excess moisture.
- Safety First: Always use a clean kajal pencil to avoid infection. Sharpen your pencil before each use.
B. Winged Liner:
The classic! The winged liner is a timeless look that can be adapted to suit any eye shape.
- Technique: Start by drawing a thin line along your upper lash line, as close to the lashes as possible. Extend the line outwards and upwards, creating a wing. The angle and length of the wing will depend on your eye shape and personal preference.
- Pro Tip: Use a piece of tape or a business card as a guide to create a sharp, even wing.
- Kajal Hack: If you mess up your wing, don’t panic! Use a cotton swab dipped in makeup remover to clean up the edges.
C. Smoky Eye:
The smoky eye is a sultry, smoldering look that’s perfect for evening events.
- Technique: Apply kajal to your upper lash line and smudge it outwards with a smudge brush. Apply more kajal to the outer corners of your eye and blend it upwards into the crease. Add a touch of eyeshadow to the crease for extra depth and dimension.
- Pro Tip: Start with a light hand and build up the intensity gradually. It’s easier to add more kajal than it is to remove it.
- Kajal Trick: Use a lighter shade of kajal on the inner corners of your eye to brighten your look.
IV. The Lower Lash Line: Sultry Shadows & Subtle Definition
(Professor Winkleton switches to a softer brush.)
Now, let’s descend to the lower lash line, the often-overlooked realm of kajal application. This area can be tricky, but with the right techniques, you can achieve a sultry, defined look that’s both captivating and comfortable.
Now, let’s descend to the lower lash line, the often-overlooked realm of kajal application. This area can be tricky, but with the right techniques, you can achieve a sultry, defined look that’s both captivating and comfortable.
A. Application Techniques:
- Subtle Definition: For a natural look, apply a thin line of kajal to the outer third of your lower lash line. This will add definition without looking too harsh.
- Full Definition: Apply kajal to the entire lower lash line for a more dramatic look. Be sure to blend the edges to soften the line and prevent it from looking too harsh.
- Waterline Application: For a truly intense look, apply kajal to the lower waterline. This will make your eyes appear larger and more defined. Be careful not to poke yourself! (Ouch!)
B. Eye Shape Considerations:
- Small Eyes: Avoid applying dark kajal to the entire lower lash line, as this can make your eyes appear smaller. Instead, focus on the outer corners and use a lighter shade of kajal.
- Wide-Set Eyes: Applying kajal to the entire lower lash line can help to balance your features.
- Close-Set Eyes: Avoid applying dark kajal to the inner corners of your lower lash line, as this can make your eyes appear even closer together.
C. Creating Different Effects:
- Smudged & Sultry: Use a smudge brush to soften the kajal along your lower lash line for a smoky, bedroom-eyes effect.
- Bright & Awake: Apply a nude or white kajal to your lower waterline to make your eyes appear larger and more awake.
- Pop of Color: Experiment with colored kajals on your lower lash line for a fun and unexpected twist. Think emerald green, sapphire blue, or amethyst purple! 💎
Table 2: Lower Lash Line Kajal Guide
| Eye Shape | Application Tip | Effect |
|---|---|---|
| Small Eyes | Apply kajal to the outer third of the lower lash line. Use a lighter shade. | Adds definition without making eyes look smaller. |
| Wide-Set Eyes | Apply kajal to the entire lower lash line. | Balances features. |
| Close-Set Eyes | Avoid applying kajal to the inner corners of the lower lash line. | Prevents eyes from appearing closer together. |
| Any Eye Shape | Nude/white kajal on the waterline. | Makes eyes appear larger and more awake. |
| Any Eye Shape | Colored kajal on the lower lash line. | Adds a pop of color and personality. |
V. Waterproof Warrior: Sealing the Deal
(Professor Winkleton pulls out a bottle of setting spray with a triumphant grin.)
Alright, we’ve created our kajal masterpieces! But what good is a masterpiece if it melts down your face the second you step outside? We need to waterproof that bad boy!
A. Layering is Key:
- Primer First: As mentioned earlier, eyeshadow primer is crucial for creating a smooth base and preventing creasing.
- Set with Powder: After applying your kajal, gently dust it with a translucent setting powder. This will help to absorb excess oil and lock the kajal in place.
B. Waterproof Products:
- Waterproof Kajal: Opt for a waterproof kajal formula for maximum staying power.
- Waterproof Eyeliner Sealer: Apply a thin layer of waterproof eyeliner sealer over your kajal to create a barrier against water and sweat.
C. Setting Spray Savvy:
- Application Technique: Hold the setting spray about 8-10 inches away from your face and spritz evenly. Avoid spraying too close, as this can cause your makeup to run.
- Types of Setting Sprays: Choose a setting spray that’s specifically designed to be waterproof or long-lasting.
D. Blotting is Your Best Friend:
- Blotting Papers: Keep blotting papers on hand to absorb excess oil throughout the day. Gently press the blotting paper onto your skin to remove oil without disturbing your makeup.
Table 3: Waterproofing Arsenal
| Product | Purpose | Application |
|---|---|---|
| Eyeshadow Primer | Creating a smooth base, preventing creasing | Apply to eyelids before applying any other eye makeup. |
| Setting Powder | Locking in kajal, absorbing excess oil | Gently dust over kajal with a fluffy brush. |
| Waterproof Kajal | Providing long-lasting, smudge-proof wear | Apply to lash lines and waterline as desired. |
| Waterproof Eyeliner Sealer | Creating a waterproof barrier over kajal | Apply a thin layer over kajal with a fine brush. |
| Waterproof Setting Spray | Setting makeup, providing long-lasting, smudge-proof wear | Hold 8-10 inches away from face and spritz evenly. |
| Blotting Papers | Absorbing excess oil throughout the day | Gently press onto skin to remove oil without disturbing makeup. |
VI. Troubleshooting: Kajal Calamities and Their Cures
(Professor Winkleton sighs dramatically.)
Ah, the inevitable! Even the most skilled kajal artists encounter mishaps. Let’s address some common kajal calamities and their cures.
A. Smudging:
- Cause: Oily eyelids, humid weather, or using a kajal that’s too creamy.
- Cure: Use an eyeshadow primer, set your kajal with powder, and opt for a drier formula.
B. Fading:
- Cause: Not using a primer, or using a kajal that’s not pigmented enough.
- Cure: Always use a primer, choose a highly pigmented kajal, and layer your kajal for added intensity.
C. Transferring:
- Cause: Applying too much kajal to the lower lash line, or having hooded eyelids.
- Cure: Apply a thin layer of kajal to the lower lash line and blend well. Use a Q-tip to clean up any excess product. For hooded eyes, consider tightlining instead of applying kajal to the lower lash line.
D. Irritation:
- Cause: Using a kajal that contains irritating ingredients, or having sensitive eyes.
- Cure: Choose a kajal that’s specifically formulated for sensitive eyes. Perform a patch test before applying the kajal to your eyes. If you experience any irritation, discontinue use immediately.
E. Uneven Application:
- Cause: Lack of practice, or using a brush that’s not suitable for the task.
- Cure: Practice makes perfect! Use a high-quality angled brush for precise application.
VII. Kajal Creativity: Beyond the Basics
(Professor Winkleton’s eyes sparkle with excitement.)
Now, let’s break free from the shackles of convention! Kajal isn’t just about black lines; it’s a tool for artistic expression!
A. Colorful Kajals:
- Explore the rainbow! Experiment with colored kajals in shades of blue, green, purple, brown, and even gold.
- Use colored kajals to complement your eye color or create a bold, statement look.
B. Graphic Liner:
- Create bold, geometric shapes around your eyes using kajal. Think sharp angles, bold lines, and unexpected placements.
- Use stencils to create intricate designs.
C. Avant-Garde Looks:
- Push the boundaries of kajal application by creating unconventional looks that defy traditional beauty standards.
- Experiment with textures and finishes by combining kajal with other makeup products.
D. Layering Textures:
- Apply a shimmer eyeshadow over your kajal for a luminous effect.
- Add glitter to your kajal for a touch of sparkle. ✨
VIII. Q&A: Ask Professor Kajalina!
(Professor Winkleton gestures to the audience with a flourish.)
And now, my dears, the moment you’ve all been waiting for! It’s time for Q&A! Ask me anything! No kajal question is too silly, too complex, or too outrageous!
(Professor Winkleton eagerly awaits your questions, a mischievous twinkle in her eye.)
(The lecture hall fills with eager hands reaching for the sky. The quest for kajal perfection continues!)
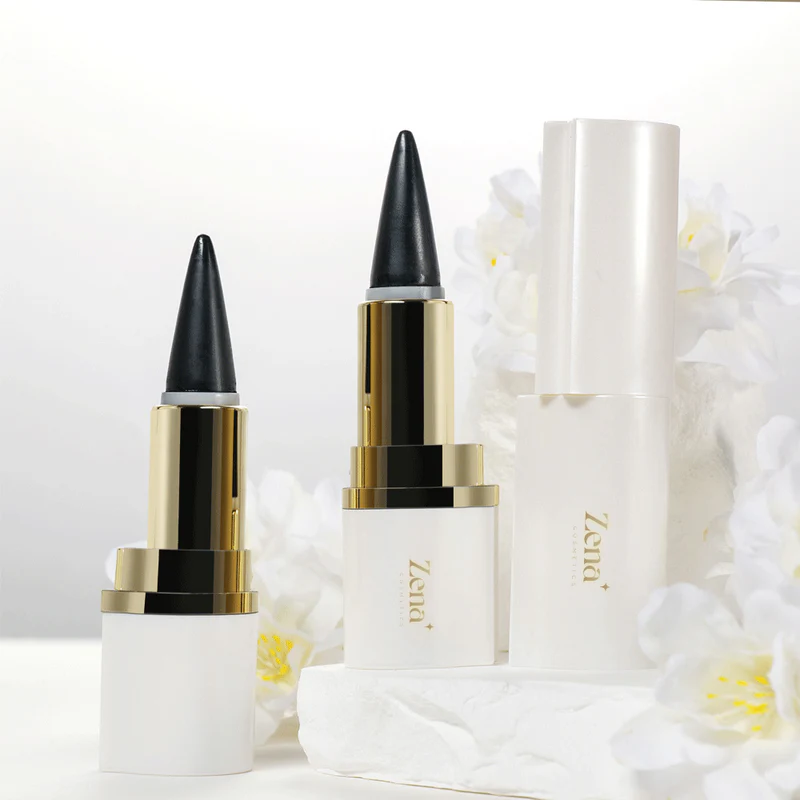
For detailed product specifications and purchases, please go to :https://zenamakeup.com/products/glided-on-waterproof-kajal-eyeliner
Leave a Reply