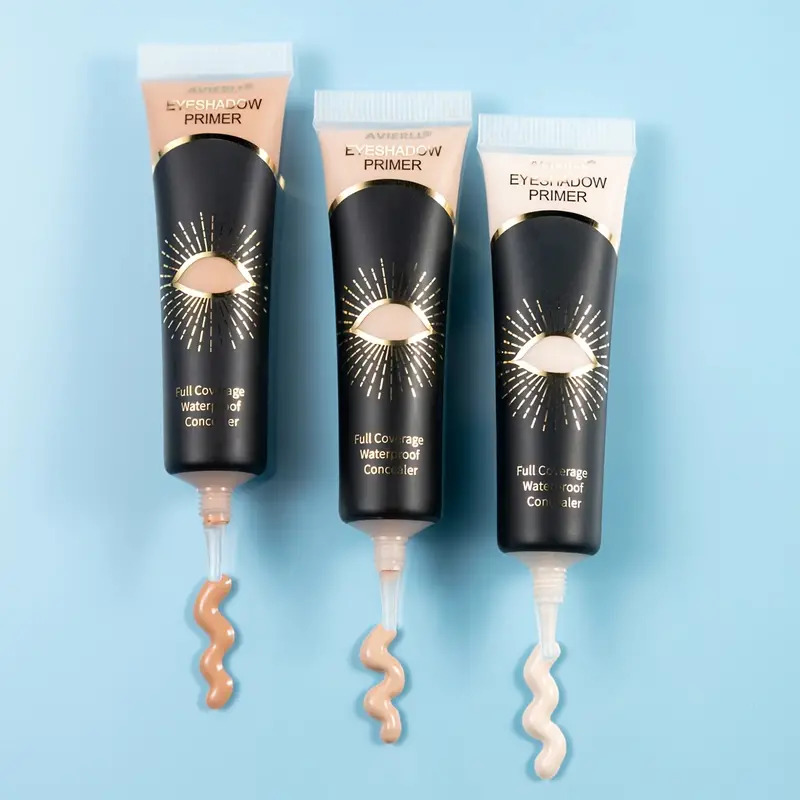
Lecture: Using the No-Crease Eyeshadow Primer – Long-Wear Liquid Base for Creating Sharp Lines: A Masterclass in Edges
Alright, future makeup maestros! Welcome, welcome, one and all, to the hallowed halls of… well, my laptop screen. But don’t let the digital setting fool you. Today, we’re diving deep into a topic that separates the dabblers from the divas, the amateurs from the artists: achieving sharp, precise eyeshadow lines using the No-Crease Eyeshadow Primer – Long-Wear Liquid Base! 👑
Forget those blurry, faded attempts that resemble a watercolor painting gone wrong. Today, we’re building skyscrapers of eyeshadow, crafting architectural masterpieces on your eyelids, and basically turning you into the Michelangelo of makeup. (Without the whole lying-on-your-back-painting-a-ceiling bit, thankfully. Your neck will thank you.)
(Disclaimer: I am not responsible for any sudden urges to wear dramatic eyeliner to the grocery store after this lecture. Embrace the drama!)
I. Why We Need a Primer (and Why This One is the Bomb-Diggity)
Imagine trying to paint a mural on a canvas covered in oil. Disaster, right? Your eyeshadow is the mural, and your eyelid, well, it’s naturally oily. Enter: the unsung hero of the makeup world, the eyeshadow primer.
Think of your No-Crease Eyeshadow Primer – Long-Wear Liquid Base as the glue that holds everything together and the shield that protects your masterpiece from the ravages of time (and oily eyelids). It’s like the secret agent of your makeup bag, working silently in the background to keep you looking fabulous.
But not all primers are created equal. Some are greasy, some are chalky, some just… disappear. This particular primer, my friends, is a game-changer. Why? Let’s break it down:
- No-Crease Formula: This is the holy grail. No more eyeshadow migrating into your crease and forming a muddy mess. We want sharp lines, not geological formations. ⛰️❌
- Long-Wear: We’re talking all-day (or all-night) power. Your eyeshadow will be as vibrant at the end of the day as it was at the beginning. Imagine the possibilities!
- Liquid Base: This means it blends beautifully, providing a smooth, even canvas for your eyeshadow application. Think of it as smoothing out the wrinkles on your artistic soul. 🎨
- Grippy Texture: This is the secret weapon for sharp lines. The slightly tacky texture grabs onto the eyeshadow pigment, allowing for precise placement and preventing fallout (those pesky little eyeshadow particles that end up on your cheeks). 💥
In short, this primer is basically the Beyoncé of eyeshadow primers. Flawless, powerful, and leaves everyone else in awe. 🐝
II. The Tools of the Trade (Because Michelangelo Didn’t Use His Fingers)
Okay, now that we’ve established the importance of our star player, let’s gather the supporting cast. You’ll need:
| Tool | Purpose | Alternative |
|---|---|---|
| No-Crease Eyeshadow Primer | The MVP. Creates a smooth, even, and grippy base for eyeshadow. | (Seriously, just get this primer. But if you must, a similar texture, long-wear primer) |
| Eyeshadow Brush (Angled) | For creating sharp, defined lines. Choose a brush with stiff bristles for maximum precision. | Small, detail brush; thin eyeliner brush |
| Eyeshadow (Preferred Color) | For creating your sharp line. Choose a highly pigmented eyeshadow for maximum impact. | Pigment; Pressed eyeshadow |
| Concealer (Optional) | To clean up any stray lines and create an even sharper edge. Think of it as the eraser for your eyeshadow masterpiece. | Cotton swab with makeup remover |
| Makeup Remover Wipes | For those "oops" moments. We’ve all been there. Don’t worry, we won’t judge. | Micellar water and cotton pads |
| Mirror (Magnifying) | To see every single detail. Precision is key! (Unless you’re going for an abstract look. Then, by all means, wing it!) | A regular mirror will do, but magnifying helps |
(Pro-Tip: Treat your brushes with respect! Clean them regularly. Dirty brushes are like using a dull knife – frustrating and potentially dangerous. (Okay, maybe not dangerous, but definitely unhygienic.) 🧼
III. The Application Process: From Zero to Leonardo da Vinci
Alright, let’s get down to business. Here’s the step-by-step guide to creating those envy-inducing sharp eyeshadow lines:
Step 1: Prep Your Canvas (aka Your Eyelid)
Just like any good artist, you need a clean canvas. Make sure your eyelids are clean and dry. No residual makeup, no oily residue. Wipe them down with a makeup remover wipe if necessary.
Step 2: Prime Time!
- Dispense: Squeeze a tiny amount of the No-Crease Eyeshadow Primer onto the back of your hand. Remember, a little goes a long way! We’re not frosting a cake here. 🍰🚫
- Apply: Using your finger or a flat eyeshadow brush, gently apply the primer to your entire eyelid, from lash line to brow bone. Make sure to blend it evenly. We want a smooth, seamless base.
- Wait: Give the primer a minute or two to set. You’ll notice it becomes slightly tacky. This is good! This is what we want! This is the magic! ✨
Step 3: The Sharp Line Technique: Choose Your Weapon!
This is where the fun begins. There are several techniques you can use to achieve a sharp line, so choose the one that works best for you:
a) The Tape Trick:
- Placement: Cut a small piece of painter’s tape (or medical tape, if you have sensitive skin) and place it at an angle from the outer corner of your eye towards the end of your eyebrow. This will act as a guide for your line.
- Application: Dip your angled brush into your chosen eyeshadow color and gently press it along the edge of the tape. Start with a thin line and build up the intensity as desired.
- Removal: Carefully peel off the tape. Voila! A perfectly sharp line. You’re basically a surgeon of eyeshadow. 👩⚕️
b) The Business Card Method:
- Placement: Hold a business card (or any stiff piece of paper) at an angle from the outer corner of your eye towards the end of your eyebrow. Just like the tape, this will act as a guide.
- Application: Dip your angled brush into your chosen eyeshadow color and gently press it along the edge of the card. Start with a thin line and build up the intensity as desired.
- Removal: Remove the card. Boom! Sharpness achieved. 💥
c) The Freehand Frenzy (For the Brave and the Bold):
- Steady Hand: Find a comfortable position and brace your elbow on a table or mirror. This will help you keep your hand steady.
- Start Thin: Begin with a very thin line along your lash line, extending it slightly outwards and upwards at the outer corner of your eye.
- Build Up: Gradually thicken the line, using short, controlled strokes. Don’t try to draw the entire line in one go. Patience is key!
- Angle Awareness: Keep the angle consistent on both eyes. Nobody wants lopsided eyeshadow wings. 🦋❌
d) The Stencil Solution:
- Acquire a stencil: Purchase pre-made eyeshadow stencils. These can be found online or at most beauty supply stores.
- Placement: Place the stencil on your eye, lining it up with the desired placement for your sharp line.
- Application: Dip your angled brush into your chosen eyeshadow color and gently fill in the stencil.
- Removal: Carefully remove the stencil. Ta-da! A perfectly stenciled sharp line. ✨
Step 4: Blend, Blend, Blend! (But Not Too Much)
While we want sharp lines, we don’t want them to look harsh and unnatural. Use a clean blending brush to gently soften the edges of the line, blending it into the rest of your eyeshadow look. This will create a more seamless and professional finish.
(Important Note: Don’t over-blend! We’re softening the edges, not erasing the line. Remember, we’re aiming for sharpness, not a blurry mess.) ⚠️
Step 5: Clean Up Crew (Optional but Highly Recommended)
Even the best artists make mistakes. If you’ve strayed outside the lines, don’t panic! Dip a cotton swab into some makeup remover and gently clean up any stray marks. You can also use a small concealer brush to sharpen the edge of the line and create an even more defined look.
Step 6: Seal the Deal (Setting Spray)
To ensure your masterpiece lasts all day, finish with a setting spray. This will lock everything in place and prevent your eyeshadow from fading or creasing.
IV. Troubleshooting: When Things Go Wrong (and How to Fix Them)
Let’s be honest, even with the best primer and the most meticulous technique, sometimes things go wrong. Here are some common problems and how to fix them:
| Problem | Solution |
|---|---|
| Uneven Lines | Take a deep breath! Use a cotton swab dipped in makeup remover to even out the lines. Remember, practice makes perfect. |
| Eyeshadow Fallout | Apply your eye makeup before your foundation. This way, you can easily wipe away any fallout without ruining your base. |
| Lines Not Sharp Enough | Use a concealer brush to sharpen the edge of the line. You can also use a darker eyeshadow color to create a more defined look. |
| Eyeshadow Fading Throughout the Day | Make sure you’re using a long-wear eyeshadow primer. You can also touch up your eyeshadow throughout the day to maintain its vibrancy. |
| Primer is making eyeshadow patchy | You are likely using too much primer. A little goes a long way! Blend the primer completely into the eyelid before eyeshadow application. |
(Remember: Makeup is all about experimentation! Don’t be afraid to try new techniques and find what works best for you. And most importantly, have fun!) 🎉
V. Advanced Techniques: Taking Your Sharp Line Game to the Next Level
Once you’ve mastered the basics, you can start experimenting with more advanced techniques:
- Cut Crease: Create a sharp, defined crease using a contrasting eyeshadow color. This will add depth and dimension to your eyes.
- Graphic Liner: Use your sharp line skills to create bold, graphic eyeliner designs. Think geometric shapes, abstract patterns, and anything else your heart desires.
- Halo Eye: Place a bright eyeshadow color in the center of your lid and blend it outwards, creating a halo effect. Use your sharp line skills to define the outer edges of the halo.
- Reverse Cat Eye: Instead of winging out the liner at the top lash line, wing it out from the lower lash line. This creates a dramatic and edgy look.
(The possibilities are endless! Let your creativity run wild!) 🌈
VI. Conclusion: Go Forth and Conquer!
Congratulations, my dear students! You have now been armed with the knowledge and skills to create sharp, defined eyeshadow lines using the No-Crease Eyeshadow Primer – Long-Wear Liquid Base. Go forth and conquer the makeup world!
Remember, practice makes perfect. Don’t be discouraged if your first attempt isn’t flawless. Keep practicing, experimenting, and having fun. And most importantly, embrace your inner artist and let your creativity shine! ✨
Now, go out there and slay those eyeshadow looks! Class dismissed! 👩🎓
For detailed product specifications and purchases, please go to :https://zenamakeup.com/products/no-crease-eyeshadow-primer-long-wear-liquid-base
Leave a Reply