Using the Peel Off Jelly Lip Stain to Define and Enhance Your Natural Lip Shape: A Lecture for Lip Lovers 💋
Alright, settle down class! Today, we’re diving deep into the glorious, slightly sticky, and surprisingly transformative world of Peel Off Jelly Lip Stains. Forget your grandma’s dusty lipstick tube; we’re talking about a futuristic lip revolution. We’re not just coloring our lips today; we’re sculpting, defining, and enhancing our natural beauty…with a little bit of peel-off magic! ✨
Professor: (Adjusts imaginary spectacles, points dramatically with a lip-stained finger) I’m Professor Lip-Lustre, and I’ll be your guide on this journey to luscious, long-lasting lip perfection.
Course Objectives:
By the end of this lecture, you will be able to:
- Understand the science and magic behind Peel Off Jelly Lip Stains. 🧪
- Identify your natural lip shape and its unique characteristics. 🤔
- Master the application techniques for defining and enhancing your lip shape using Peel Off Jelly Lip Stains. 🖌️
- Troubleshoot common Peel Off Jelly Lip Stain mishaps and achieve flawless results. 🚨
- Confidently rock your perfectly stained pout! 💃
Lecture Outline:
- The Peel Off Jelly Lip Stain: A Modern Marvel (and a Little Bit Weird)
- Know Thyself (Your Lip Shape, That Is!)
- The Artist’s Palette: Choosing the Right Shade
- Application Techniques: From Awkward Teenager to Lip Stain Pro
- Troubleshooting: When Good Stains Go Bad (and How to Fix Them!)
- Aftercare: Keeping Your Lips Happy and Healthy
- Advanced Techniques: Lip Contouring and Ombre Effects
- The Future of Lip Staining: Where Do We Go From Here?
- Q&A: Ask Professor Lip-Lustre Anything!
1. The Peel Off Jelly Lip Stain: A Modern Marvel (and a Little Bit Weird)
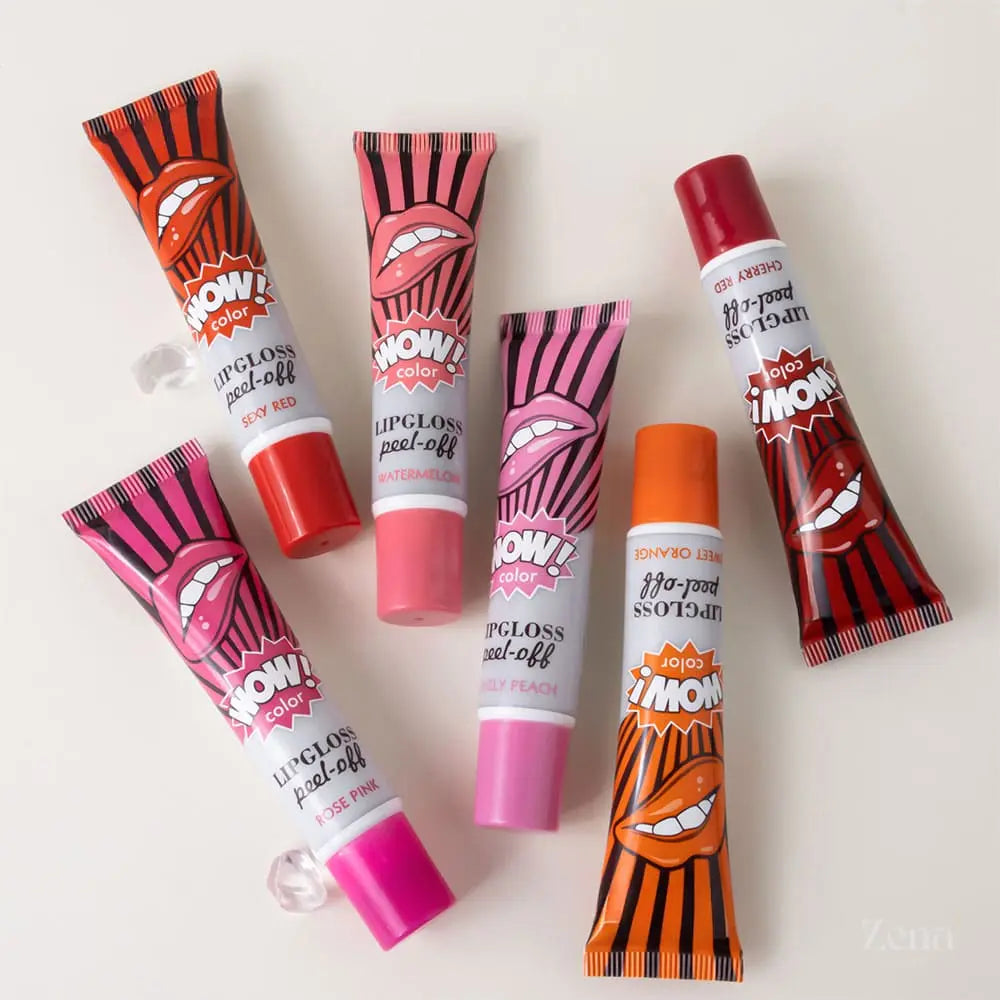
Let’s face it, the first time you saw a Peel Off Jelly Lip Stain, you probably thought, "What in the actual wizardry is this?" A gooey, colorful gel that you slather on your lips, let dry, and then…peel off? It sounds like something out of a science fiction movie, or maybe a slightly disturbing ASMR video. But trust me, the results are worth the initial apprehension.
So, what is this magical potion?
Peel Off Jelly Lip Stains are essentially a type of lip tint that uses a unique delivery system. They are formulated with a high concentration of pigment suspended in a gel base. When applied, the gel creates a film on the lips. As the gel dries, it shrinks and adheres to the top layer of skin. The pigment is then transferred to the lips, staining them with a beautiful, long-lasting color. The magic is in the peel-off film that removes the dried gel, leaving behind only the stain.
Why are they so popular?
- Long-Lasting Color: Unlike traditional lipsticks that fade with eating, drinking, and general existence, lip stains can last for hours, even through meals! 🍔🍕
- Smudge-Proof and Kiss-Proof: Say goodbye to lipstick on your coffee cup and embarrassing smudges on your partner’s cheek. 💋🚫
- Natural-Looking Finish: Lip stains provide a sheer, natural-looking flush of color that enhances your own lip tone rather than masking it. 🌸
- Fun Factor: Let’s be honest, peeling off the dried gel is strangely satisfying. It’s like a mini-spa treatment for your lips! 😌
The Science Bit (Don’t worry, it’s not that boring):
| Component | Function |
|---|---|
| Water | Provides a base for the formula and helps dissolve the other ingredients. |
| Glycerin | A humectant that attracts moisture to the lips, keeping them hydrated. 💧 |
| Film-Forming Polymers | Create the peel-off film that holds the pigment and allows for easy removal. |
| Pigments | Provide the color that stains the lips. |
| Flavoring Agents | Make the stain taste (and smell) delicious! 🍓🍒 |
| Preservatives | Prevent the growth of bacteria and mold, ensuring the product’s safety and shelf life. |
2. Know Thyself (Your Lip Shape, That Is!)
Before we start slathering on the stain, we need to understand what we’re working with. Knowing your natural lip shape is crucial for achieving the best results. Think of it as understanding the canvas before you start painting.
Here are some common lip shapes:
- Full Lips: Characterized by plumpness in both the upper and lower lips. (Think Angelina Jolie) 👄
- Thin Lips: Characterized by a lack of fullness in both the upper and lower lips. (Think Kirsten Dunst) 📏
- Wide Lips: Characterized by a greater width across the face. (Think Julia Roberts) ↔️
- Round Lips: Characterized by a rounded shape with a prominent Cupid’s bow. (Think Marilyn Monroe) ⭕
- Heart-Shaped Lips: Characterized by a defined Cupid’s bow and a point at the center of the lower lip. (Think Taylor Swift) ❤️
- Uneven Lips: Where the upper and lower lips have different thicknesses or shapes. ⚖️
- Downturned Lips: Where the corners of the mouth angle downwards. ↘️
- Upturned Lips: Where the corners of the mouth angle upwards. ↗️
How to Identify Your Lip Shape:
- Look in a mirror: Seriously. This isn’t rocket science. 🚀
- Relax your face: Don’t try to force a smile or pout. We want to see your natural lip shape. 😐
- Observe the following:
- The fullness of your upper and lower lips.
- The shape of your Cupid’s bow.
- The width of your mouth.
- The angle of the corners of your mouth.
Pro Tip: Take a picture of your lips and trace the outline with a finger or stylus. This will help you visualize your lip shape more clearly. 📸
Why does knowing your lip shape matter?
Knowing your lip shape allows you to:
- Choose the right shade: Certain shades can enhance or minimize certain features of your lips.
- Apply the stain correctly: Different lip shapes require different application techniques.
- Create the illusion of fuller or thinner lips: With the right technique, you can manipulate your lip shape to achieve your desired look.
3. The Artist’s Palette: Choosing the Right Shade
Now that you know your lip shape, it’s time to choose the perfect shade. This is where things get fun (and potentially overwhelming). With so many colors to choose from, how do you know which one is right for you?
Factors to Consider:
- Skin Tone: This is the most important factor.
- Fair Skin: Light pinks, nudes, and corals. Avoid dark, vampy colors that can make you look washed out. 👻
- Medium Skin: Roses, berries, and mauves. You can also pull off brighter colors like orange and fuchsia. 🌸
- Olive Skin: Peaches, browns, and terracotta. Earthy tones look amazing on olive skin. 🌿
- Dark Skin: Deep reds, purples, and browns. Don’t be afraid to go bold! 🍷
- Undertone: Are you warm, cool, or neutral?
- Warm Undertones: Look for shades with yellow or orange undertones. ☀️
- Cool Undertones: Look for shades with blue or purple undertones. ❄️
- Neutral Undertones: You can wear pretty much anything! 🎉
- Occasion: Are you going for a natural everyday look or a glamorous evening look?
- Everyday: Nudes, pinks, and corals. ☀️
- Evening: Reds, purples, and berries. 🌙
- Personal Preference: Ultimately, the best shade is the one that makes you feel confident and beautiful! 🥰
Here’s a handy table to help you choose the right shade:
| Skin Tone | Undertone | Best Shades | Shades to Avoid |
|---|---|---|---|
| Fair | Warm | Peach, coral, light pink | Dark reds, browns |
| Fair | Cool | Light pink, nude, berry | Orange, brown |
| Medium | Warm | Rose, peach, terracotta | Very light pinks |
| Medium | Cool | Berry, mauve, fuchsia | Yellow-based shades |
| Olive | Warm | Brown, terracotta, bronze | Light pinks, pastels |
| Olive | Cool | Plum, berry, wine | Orange-based shades |
| Dark | Warm | Deep red, brown, bronze | Pale pinks, nudes that are too light |
| Dark | Cool | Purple, berry, wine | Orange-based shades, nudes that are too light |
Pro Tip: Swatch the stain on your wrist or the back of your hand to see how it looks against your skin tone. ✋
4. Application Techniques: From Awkward Teenager to Lip Stain Pro
Alright, class, it’s time to put our knowledge into practice! Application is key to achieving a flawless, long-lasting lip stain. Follow these steps carefully, and you’ll be rocking a perfect pout in no time.
Step 1: Exfoliate Your Lips:
This is crucial! Dry, flaky lips will prevent the stain from adhering evenly, resulting in a patchy, uneven finish. Use a gentle lip scrub or a toothbrush to exfoliate your lips before applying the stain. 💋➡️ smooth
Step 2: Hydrate Your Lips:
Apply a thin layer of lip balm and let it absorb completely. This will create a smooth, moisturized base for the stain. 💧
Step 3: Outline Your Lips (Optional):
If you want to define your lip shape even further, use a lip liner that matches your natural lip color. This will help prevent the stain from bleeding and create a more precise outline. ✏️
If you want to define your lip shape even further, use a lip liner that matches your natural lip color. This will help prevent the stain from bleeding and create a more precise outline. ✏️
Step 4: Apply the Stain:
Using the applicator provided (or a lip brush), apply a generous layer of the stain to your lips. Make sure to cover your entire lip surface evenly. Don’t be afraid to go slightly outside your natural lip line to create the illusion of fuller lips.
Important Considerations Based on Lip Shape:
- Thin Lips: Slightly overdraw your lip line to create the illusion of fuller lips. Use a light or medium shade to avoid making your lips look smaller.
- Full Lips: Focus on defining your natural lip shape. Avoid overdrawing your lip line, as this can make your lips look too big. Use a darker shade to create a more defined look.
- Uneven Lips: Use the stain to even out the shape of your lips. Apply more stain to the thinner lip to make it appear fuller.
- Downturned Lips: Focus on lifting the corners of your mouth. Apply more stain to the center of your lips and avoid extending the stain too far down at the corners.
Step 5: Wait Patiently (the hardest part!):
Let the stain dry completely. This usually takes about 10-20 minutes, depending on the formula. Avoid touching your lips during this time. You should feel the stain tightening on your lips as it dries. ⏳
Step 6: Peel Off the Stain:
Once the stain is completely dry, gently peel it off from the corners of your mouth. If the stain is sticking, you can use a damp cotton swab to loosen it.
Step 7: Admire Your Work!
Voila! You now have perfectly stained lips that will last for hours. ✨
5. Troubleshooting: When Good Stains Go Bad (and How to Fix Them!)
Let’s be real, things don’t always go according to plan. Here are some common Peel Off Jelly Lip Stain mishaps and how to fix them:
- Patchy Stain: This is usually caused by uneven application or dry lips. Exfoliate and hydrate your lips before applying the stain. Make sure to apply an even layer of the stain to your entire lip surface.
- Stain Doesn’t Peel Off Easily: This can be caused by applying too thin a layer of stain or not letting it dry completely. Apply a thicker layer of stain and wait longer for it to dry.
- Stain Bleeds: This can be caused by applying the stain outside your lip line or having oily skin. Use a lip liner to create a barrier around your lips. You can also dust a light layer of powder around your lips to absorb excess oil.
- Stain is Too Dark: Apply a layer of lip balm over the stain to lighten the color. You can also use a cotton swab dipped in makeup remover to gently remove some of the stain.
- Stain is Too Light: Apply another layer of stain to deepen the color.
Troubleshooting Table:
| Problem | Cause | Solution |
|---|---|---|
| Patchy Stain | Uneven application, dry lips | Exfoliate, hydrate, apply even layer |
| Difficult Peel | Thin layer, insufficient drying time | Apply thicker layer, wait longer |
| Bleeding Stain | Application outside lip line, oily skin | Use lip liner, powder around lips |
| Too Dark | Shade too intense | Apply lip balm, gently remove stain with makeup remover |
| Too Light | Shade too light, insufficient application | Apply another layer |
6. Aftercare: Keeping Your Lips Happy and Healthy
Just like any other beauty treatment, lip staining requires a little bit of aftercare to keep your lips looking their best.
- Hydrate, Hydrate, Hydrate: Apply lip balm regularly to keep your lips moisturized. 💧
- Avoid Harsh Products: Avoid using harsh lip scrubs or cleansers that can irritate your lips.
- Sun Protection: Protect your lips from the sun by using a lip balm with SPF. ☀️
- Gentle Exfoliation: Continue to exfoliate your lips gently once or twice a week to remove any dead skin cells.
7. Advanced Techniques: Lip Contouring and Ombre Effects
Once you’ve mastered the basic application techniques, you can start experimenting with more advanced techniques like lip contouring and ombre effects.
- Lip Contouring: Use a darker shade of lip stain to contour the edges of your lips and a lighter shade to highlight the center. This will create the illusion of fuller, more defined lips.
- Ombre Lips: Apply a darker shade of lip stain to the outer edges of your lips and a lighter shade to the center. Blend the two shades together to create a seamless ombre effect.
8. The Future of Lip Staining: Where Do We Go From Here?
The world of lip staining is constantly evolving. We can expect to see even more innovative products and techniques in the future, such as:
- Longer-lasting formulas: Stains that last for even longer periods of time.
- More natural ingredients: Stains that are formulated with natural and organic ingredients.
- Customizable shades: Stains that allow you to create your own custom shades.
- Peel-off lip masks: Masks that not only stain your lips but also provide hydration and nourishment.
9. Q&A: Ask Professor Lip-Lustre Anything!
Alright class, that concludes our lecture on Peel Off Jelly Lip Stains. Now, it’s time for Q&A. Don’t be shy, ask me anything!
(Professor Lip-Lustre beams, adjusts imaginary spectacles, and awaits your burning lip-related questions.)
(Example Questions and Answers):
Student: Professor, will this work on mature lips with fine lines?
Professor: Excellent question! Yes, it can, but preparation is key! Exfoliation to remove any dead skin and a very hydrating lip balm underneath will help the stain apply more evenly and prevent it from settling into those fine lines. Also, avoid overly dark shades that can accentuate wrinkles. A soft, natural shade will be your best friend!
Student: Can I use this on chapped lips?
Professor: Absolutely NOT! Think of it like trying to paint a masterpiece on a cracked canvas. It just won’t work. Heal those chapped lips first with a good quality lip balm. Then, and only then, can you unleash the power of the peel-off stain!
Student: Is there a way to make the color last even longer?
Professor: You are an ambitious student! A little trick I’ve learned is to apply a tiny bit of clear lip gloss over the stain once it’s completely set. It acts as a sealant. But be warned, too much gloss can make it sticky!
(End of Lecture)
Remember class, practice makes perfect. Don’t be afraid to experiment with different shades and techniques to find what works best for you. And most importantly, have fun! After all, makeup should be a form of self-expression, not a chore. Now go forth and conquer the world…with perfectly stained lips! 😉
For detailed product specifications and purchases, please go to :https://zenamakeup.com/products/peel-off-jelly-lip-stain
Leave a Reply