Lecture: The Sexy Stained Lip Marker Tint: Your Secret Weapon for Lipstick Longevity (and Looking Scandalously Kissable)
Alright, settle down, settle down, class is in session! 👩🏫 Today, we’re not dissecting frogs, we’re dissecting…lipstick! And more specifically, we’re exploring the underappreciated power of the lip marker tint, specifically, for the sake of this incredibly evocative title, the "Sexy Stained Lip Marker Tint," as a base layer for maximizing the staying power of all your lip product dreams.
Forget primers, forget lip scrubs (okay, don’t FORGET lip scrubs, hydration is KEY, darlings!), we’re diving into the juicy, pigmented world of the lip marker tint and how it can transform your lipstick game from a fleeting fling to a committed relationship. 💍
Think of it this way: Your lipstick is a diva. A gorgeous, demanding diva that requires constant attention and touch-ups. But the Sexy Stained Lip Marker Tint? That’s the sturdy stagehand, the loyal bodyguard, the unsung hero working tirelessly behind the scenes to ensure your diva’s performance goes off without a hitch. 🎭
What We’ll Cover Today:
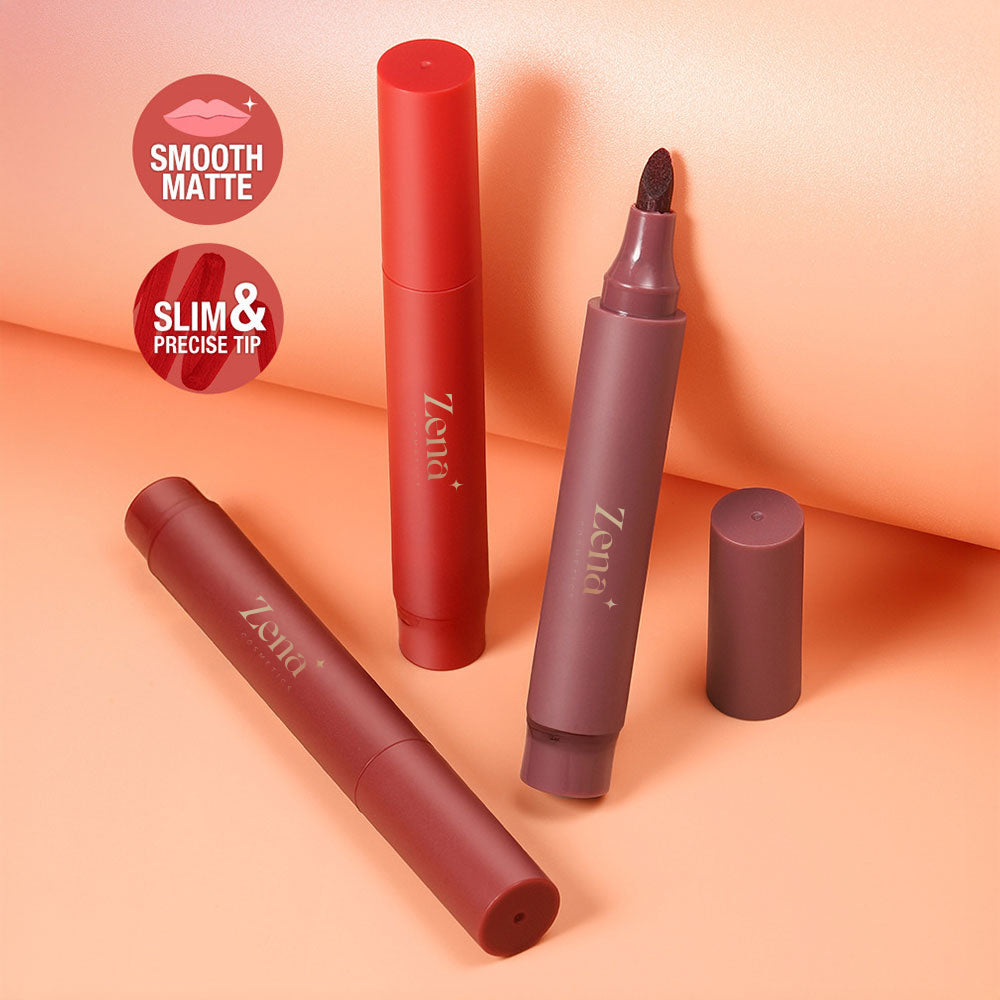
- The Anatomy of a Sexy Stained Lip Marker Tint: What is it really? (Spoiler alert: It’s more than just a fancy pen.)
- Why Use a Lip Marker Tint as a Base? The myriad of magical benefits we’ll unlock. ✨
- Choosing the Right Weapon: Selecting the perfect lip marker tint shade, formula, and brand. 🎯
- Application Techniques: From Amateur to Artist: Achieving the perfect stained base without looking like you’ve been sucking on a red popsicle. 🍭
- Lipstick Layering: The Art of the Sandwich: Crafting the perfect lip combination for maximum impact and longevity. 🥪
- Troubleshooting Lip-ocalypse: Addressing common problems like bleeding, feathering, and uneven fading. 🚨
- Beyond Lipstick: Creative Uses for Your Sexy Stained Lip Marker Tint: Because multitasking is the name of the game! 🤹♀️
- Real-World Examples & Case Studies (aka "I Tried It, So You Don’t Have To"): Sharing my personal triumphs (and hilarious disasters) so you can learn from my mistakes. 🤣
I. The Anatomy of a Sexy Stained Lip Marker Tint:
Let’s get down to brass tacks. What exactly is this "Sexy Stained Lip Marker Tint" we’re obsessing over?
It’s essentially a lip product that delivers a wash of color that stains the lips. Unlike traditional lipsticks that sit on top of the lip surface, lip marker tints penetrate the upper layers of the skin, creating a long-lasting, natural-looking color.
Think of it as a subtle, yet powerful, tattoo… for your lips! (Don’t worry, it’s not permanent…unless you’re REALLY committed to a particular shade.)
Key Characteristics:
- Water-Based or Gel-Based Formula: This allows for quick absorption and minimal transfer.
- Pigment-Rich: Delivers a concentrated dose of color that adheres to the lips.
- Long-Lasting: The stain can last for several hours, even after eating and drinking. 🥂
- Lightweight & Comfortable: Doesn’t feel heavy or sticky on the lips.
- Marker-Like Applicator: Provides precise application and allows for building intensity. ✒️
Here’s a handy table summarizing the key differences between lip marker tints and traditional lipsticks:
| Feature | Sexy Stained Lip Marker Tint | Traditional Lipstick |
|---|---|---|
| Formula | Water-based or Gel-based | Wax-based, Oil-based, or Cream-based |
| Finish | Matte or Semi-Matte | Matte, Satin, Glossy, Sheer |
| Staying Power | Long-lasting (hours) | Shorter-lasting (requires frequent touch-ups) |
| Transfer Resistance | High | Low to Moderate |
| Texture | Lightweight, comfortable | Can feel heavy, sticky, or drying |
| Pigmentation | Buildable, sheer to medium | High, full coverage |
| Application | Precise, marker-like applicator | Bullet or wand applicator |
II. Why Use a Lip Marker Tint as a Base? The Magical Benefits:
Now, for the million-dollar question: Why bother with this extra step? Why not just slap on your favorite lipstick and call it a day?
Because, my dears, we’re aiming for perfection. And perfection requires strategy, planning, and a healthy dose of lip marker tint magic! ✨
Here’s a breakdown of the benefits:
- Enhanced Staying Power: The stain creates a base layer of color that anchors your lipstick, preventing it from fading, smudging, or transferring. It’s like building a foundation for your lipstick empire! 🏰
- Reduced Bleeding and Feathering: The stain acts as a barrier, preventing lipstick from migrating into fine lines around the mouth. No more "creepy clown" lip syndrome! 🤡
- Improved Color Intensity: The stain can enhance the vibrancy of your lipstick, making it appear bolder and more pigmented. It’s like adding a shot of espresso to your lipstick! ☕
- Extended Wear Time: Even if your lipstick fades throughout the day, the stain will still provide a subtle wash of color, ensuring your lips never look completely bare. It’s like having a backup plan for your lip color! 🛡️
- Hydration Boost (Sometimes!): Some lip marker tints contain hydrating ingredients that can help keep your lips moisturized, preventing dryness and cracking. (Read ingredient lists carefully!) 💧
- Creates a Natural-Looking Fade: Instead of lipstick fading unevenly and leaving you with a dreaded "ring around the mouth," the stain will fade gradually and naturally, leaving you with a subtle, yet polished, look. 🌅
III. Choosing the Right Weapon: Selecting the Perfect Lip Marker Tint:
Not all lip marker tints are created equal. Just like choosing the right wand in Harry Potter, selecting the right lip marker tint is crucial for achieving the desired results. 🪄
Here are some factors to consider:
- Shade: Choose a shade that complements your natural lip color and the lipsticks you plan to wear. Neutrals, berries, and reds are versatile options. Think of it as the "underwear" for your lipstick. You want it to be comfortable and supportive, but not necessarily the star of the show.
- Formula: Opt for a water-based or gel-based formula that is lightweight, non-sticky, and long-lasting. Avoid formulas that contain alcohol, as they can be drying.
- Pigmentation: Look for a tint that delivers a good amount of color without being too opaque. You want to create a stain, not a full-coverage lipstick.
- Applicator: Choose a marker-like applicator that allows for precise and controlled application. A fine-tipped applicator is ideal for outlining the lips, while a thicker applicator can be used to fill in the entire lip area.
- Brand: Research different brands and read reviews to find a lip marker tint that is known for its quality, longevity, and color payoff. Some popular brands include:
- Benefit Cosmetics: Benetint Rose-Tinted Lip & Cheek Stain (A classic for a reason!)
- Peripera: Ink Airy Velvet (Lightweight and long-lasting!)
- Etude House: Dear Darling Water Gel Tint (Affordable and fruity!)
- YSL: Tatouage Couture Matte Stain (Luxury option with intense color)
Pro Tip: Swatch the lip marker tint on your hand or arm before applying it to your lips to test the color and formula. And ALWAYS check the ingredients list to avoid any potential allergens.
IV. Application Techniques: From Amateur to Artist:
Okay, you’ve chosen your weapon. Now it’s time to learn how to wield it like a pro.
Applying a lip marker tint as a base is relatively simple, but there are a few tricks to ensure a flawless finish.
Step-by-Step Guide:
- Exfoliate and Hydrate: Start with smooth, hydrated lips. Use a lip scrub to remove any dead skin cells and apply a lip balm to moisturize. (Remember that hydration is KEY!)
- Outline Your Lips (Optional): Use the tip of the lip marker to carefully outline your lips, following your natural lip line. This will help prevent lipstick from bleeding and feathering.
- Fill in Your Lips: Use the side of the lip marker to fill in the entire lip area, applying an even layer of color.
- Blot (Optional): If you want a more subtle stain, blot your lips with a tissue to remove any excess product.
- Wait for it…Let it dry!: Allow the tint to dry completely before applying your lipstick. This usually takes a minute or two. Don’t rush it!
- Apply Your Lipstick: Apply your lipstick as usual, using a lip brush or directly from the bullet.
Application Tips & Tricks:
- Start with a Light Layer: You can always build up the intensity of the stain by applying additional layers.
- Use a Lip Brush for Precision: If you have trouble applying the tint evenly, use a lip brush to blend the product.
- Clean Up Any Mistakes: Use a cotton swab dipped in makeup remover to clean up any mistakes around the lip line.
- Experiment with Different Techniques: Try applying the tint to the center of your lips and blending it outwards for a more natural-looking stain.
- Embrace the "Blotted Lip" Look: For a more casual and effortless vibe, apply the tint and then blot your lips with a tissue to remove most of the color.
V. Lipstick Layering: The Art of the Sandwich:
Now for the fun part: layering your lipstick on top of your Sexy Stained Lip Marker Tint base! This is where you can unleash your creativity and experiment with different combinations to achieve your desired look.
Think of it as building a delicious sandwich. The lip marker tint is the base layer of bread, the lipstick is the filling, and a lip gloss (optional) is the top layer of bread. 🥪
Layering Techniques:
- Matching Shades: Choose a lipstick that is a similar shade to your lip marker tint for a seamless and natural-looking finish. This is a great option for everyday wear.
- Complementary Shades: Pair your lip marker tint with a lipstick in a complementary shade to create a more vibrant and eye-catching look. For example, a berry-toned stain would look stunning with a plum lipstick.
- Contrasting Shades: Use a lip marker tint as a base for a completely different lipstick shade to create a unique and unexpected color. For example, a red stain would look amazing under a nude lipstick.
- Ombre Lips: Apply a darker lip marker tint to the outer corners of your lips and a lighter lipstick to the center to create an ombre effect.
- Glossy Finish: Top off your lipstick with a clear or tinted lip gloss for a more hydrated and luminous look.
Here’s a table with some suggested lip marker tint and lipstick pairings:
| Lip Marker Tint Shade | Lipstick Shade | Look |
|---|---|---|
| Rose Tint | Nude Pink | Natural, Everyday Chic |
| Berry Tint | Plum or Burgundy | Bold and Sophisticated |
| Red Tint | Classic Red | Timeless Glamour |
| Coral Tint | Peach or Orange | Fresh and Summery |
| Mauve Tint | Dusty Rose | Romantic and Feminine |
VI. Troubleshooting Lip-ocalypse:
Even with the best planning, things can sometimes go wrong. Here’s how to handle some common lip-related emergencies:
- Bleeding/Feathering: This is a common problem, especially with darker lipsticks. Make sure your lips are well-hydrated and use a lip liner to create a barrier. If bleeding still occurs, blot your lips with a tissue and apply a thin layer of translucent powder around your lip line.
- Uneven Fading: This can happen if the lip marker tint is not applied evenly. Make sure to apply a thin, even layer of product and blend it well.
- Dryness/Cracking: Some lip marker tints can be drying, especially if they contain alcohol. Make sure to hydrate your lips with a lip balm before and after applying the tint.
- Color Transfer: While lip marker tints are generally transfer-resistant, some transfer can still occur. Blot your lips with a tissue after applying your lipstick to remove any excess product.
- Staining Gone Wild: If the stain is too intense, use a gentle makeup remover or micellar water to lighten the color.
VII. Beyond Lipstick: Creative Uses for Your Sexy Stained Lip Marker Tint:
The beauty of the Sexy Stained Lip Marker Tint is that it’s not just for your lips! It’s a versatile product that can be used in a variety of creative ways:
- Cheek Stain: Dab a small amount of lip marker tint onto the apples of your cheeks and blend it outwards for a natural-looking flush.
- Eye Shadow Base: Apply a thin layer of lip marker tint to your eyelids as a base for your eyeshadow. This will help to intensify the color and prevent creasing.
- Brow Tint: Use a fine-tipped lip marker tint to fill in sparse eyebrows for a natural-looking definition. (Use with extreme caution!)
- Freckle Creation: Use a light brown lip marker tint to create realistic-looking freckles.
VIII. Real-World Examples & Case Studies (aka "I Tried It, So You Don’t Have To"):
Okay, time for some brutal honesty. I’ve experimented with this technique for years, and let me tell you, there have been some epic fails.
Case Study 1: The "Red Wine Disaster"
I was going to a fancy dinner, wearing a killer red dress, and wanted a bold red lip to match. I used a bright red lip marker tint as a base and topped it with a classic red lipstick. Everything was going great until I started drinking red wine…
The combination of the red wine and the red lipstick created a stain that was everywhere. My teeth, my glass, my date’s cheek… it was a red wine massacre! 🍷🩸
Lesson Learned: Be careful when pairing red lipstick with red wine. Opt for a more transfer-resistant formula or stick to clear beverages.
Case Study 2: The "Nude Lip Savior"
I have naturally pale lips, which can make nude lipsticks look washed out and lifeless. I discovered that using a rosy-toned lip marker tint as a base created a subtle flush of color that made my nude lipstick look more vibrant and flattering.
Lesson Learned: A lip marker tint can be a game-changer for making nude lipsticks work, especially for those with pale lips.
Case Study 3: The "Long-Lasting Wedding Lip"
I was a bridesmaid in my best friend’s wedding and wanted a lipstick that would last all day without constant touch-ups. I used a berry-toned lip marker tint as a base and topped it with a long-wearing matte lipstick. My lip color stayed put through the ceremony, the reception, and even the after-party!
Lesson Learned: A lip marker tint is a must-have for special occasions when you need your lip color to last.
Final Thoughts:
The Sexy Stained Lip Marker Tint is more than just a trend; it’s a legitimate tool for enhancing your lipstick game. By understanding the anatomy of a lip marker tint, choosing the right formula, mastering the application techniques, and experimenting with different layering combinations, you can unlock the secret to long-lasting, vibrant, and kissable lips. 💋
Now go forth and conquer the world, one perfectly stained lip at a time! Class dismissed! 🎓
For detailed product specifications and purchases, please go to :https://zenamakeup.com/products/sexy-stained-lip-marker-tint
Leave a Reply