Lecture: Unleash the Inner Glitter Goblin: Mastering the Art of Eye Makeup Enhancement with a 5-Piece Stick Set
(✨ Glitter icon added here for emphasis! ✨)
Alright, glitterbugs, glam-fiends, and sparkly-eyed sirens! Welcome, welcome, one and all, to today’s dazzling lecture. I see some fresh, eager faces, and I know there are seasoned makeup mavens lurking in the back, discreetly reapplying highlighter. No judgment here! We’re all united by a single, shimmering truth: a little glitter can fix anything.
Today, we’re diving deep into a topic that I hold near and dear to my glitter-encrusted heart: enhancing existing eye makeup with a 5-piece stick set. Forget complicated eyeshadow palettes and blending brushes the size of small badgers. We’re going minimalist, impactful, and gloriously sparkly.
Think of these sticks as your secret weapon, your emergency glam squad, your "I woke up like this… but also spent 5 minutes looking fabulous" solution. They are the tiny, twinkling superheroes of the makeup world, ready to rescue any eye look from the mundane.
(😂 Emoji of a woman with wild hair transforming into glam makeup 😂)
Before we launch headfirst into application techniques, let’s address the burning question in every glitter-lover’s soul:
Why Sticks? Why This Set?
Well, my darlings, sticks offer a trifecta of amazingness:
- Precision: Forget the fallout of loose glitter. Sticks provide targeted application, allowing you to place sparkle exactly where you want it, without accidentally bedazzling your entire face. (Unless, of course, that’s the goal. No judgment!)
- Portability: They’re compact! They’re travel-friendly! They’re perfect for throwing in your purse for a quick glam-up on the go. No more lugging around a suitcase of eyeshadows.
- User-Friendliness: Even makeup newbies can master these bad boys. No complex blending techniques required. Just swipe, blend (optional!), and slay.
Now, the "this set" part is key. A well-curated 5-piece set typically offers a versatile range of finishes and colors, allowing you to adapt to a variety of makeup styles and skin tones. Let’s break down what you might typically find in a stellar 5-piece stick set:
The Dream Team: Understanding Your Stick Arsenal
| Stick Type | Description | Ideal Use | Application Tips |
|---|---|---|---|
| Shimmer Stick | Provides a subtle, luminous sheen. Think of it as a highlighting stick for your eyes. | Inner corner highlight, brow bone highlight, blended all over the lid for a soft, diffused glow, layering under other shadows for added dimension. | Use a light hand! Build up the intensity gradually. Can be blended with a finger or a small brush. Avoid applying too close to the lash line, as it can sometimes make lashes appear sparse. |
| Glitter Stick | Packed with chunky glitter particles. Ideal for a dramatic, eye-catching effect. | Eyeliner, center of the lid for a pop of sparkle, outer corner accent, over a dark base shadow for maximum impact. | Apply with a dabbing motion rather than swiping to minimize fallout. Use a glitter primer underneath for extra hold. Consider using a small, stiff brush to pat the glitter into place. Clean up any stray glitter particles with tape. |
| Metallic Stick | Offers a high-shine, foiled effect. Think liquid metal for your eyelids. | All-over lid color, winged liner, crease definition (for a bold, graphic look), layering over other shadows for a metallic finish. | Blend quickly, as some metallic formulas can set fast. Use a synthetic brush for application, as natural bristles can absorb too much product. Avoid applying too thickly, as it can crease. |
| Iridescent Stick | Shifts in color depending on the light. Creates a multi-dimensional, ethereal effect. | Inner corner highlight, center of the lid for a duochrome effect, layered over other shadows to create a custom color shift. | Experiment with different base colors to see how the iridescent stick reacts. Apply a thin layer to avoid cakiness. Can be blended with a finger or a brush. |
| Matte Stick | Provides a smooth, non-shimmery finish. Can be used for defining the crease or as a base color. This might be a creamy pigment rather than a traditional shadow. | Defining the crease, creating a smoky eye, using as a base for powder shadows (especially glitter!), lining the lower lash line. | Blend thoroughly to avoid harsh lines. Use a brush to pick up product from the stick and apply to the eye for more controlled application. Set with a powder eyeshadow for longer wear. |
(💡 Emoji of a lightbulb lighting up 💡)
Pro-Tip: Don’t be afraid to mix and match! Layer a shimmer stick under a glitter stick for a multidimensional sparkle bomb. Use a matte stick to define the crease before adding a metallic lid. The possibilities are endless!
The Main Event: Techniques for Glitter-fying Your Existing Eye Makeup
Now for the fun part! Let’s explore some specific techniques for using your 5-piece stick set to elevate your everyday eye looks:
1. The "Subtle Sparkle" Upgrade:
This is perfect for those days when you want a little something extra without going full-on disco ball.
- The Base: Start with your usual eye makeup. This could be a simple wash of neutral eyeshadow, a winged liner, or even just mascara.
- The Highlight: Use your shimmer stick in the inner corner of your eye. This instantly brightens the eyes and makes you look more awake (even if you’re running on caffeine and sheer willpower).
- The Subtle Pop: Dab a tiny amount of your iridescent stick in the center of your lid. This will catch the light and add a subtle, shifting sparkle.
- The Optional Touch: If you’re feeling particularly adventurous, use your glitter stick to create a thin line along your upper lash line, just above your eyeliner.
(✅ Emoji of a checkmark ✅) This look is perfect for work, school, or any situation where you want to look polished and professional with a hint of personality.
2. The "Glam It Up" Transformation:
Ready to take your eye makeup from day to night? This technique is all about adding drama and intensity.
- The Base: Start with a neutral eyeshadow base. This will help the glitter and shimmer adhere better and prevent creasing.
- The Metallic Moment: Apply your metallic stick all over the lid, blending it up towards the crease.
- The Glitter Bomb: Apply your glitter stick to the center of the lid, focusing on the area above the pupil. You can also use it to create a winged liner for extra drama.
- The Definition: Use your matte stick to deepen the crease and create a smoky effect.
- The Finishing Touches: Add a generous coat of mascara and maybe even some false lashes for maximum impact.
(💃 Emoji of a woman dancing 💃) This look is perfect for parties, date nights, or any occasion where you want to turn heads.
3. The "Unexpected Accent" Play:
This technique is all about adding unexpected pops of color and sparkle to your eye makeup.
This technique is all about adding unexpected pops of color and sparkle to your eye makeup.
- The Base: Start with your usual eye makeup. This could be anything from a colorful eyeshadow look to a simple neutral look.
- The Lower Lash Line: Use your metallic or iridescent stick to line your lower lash line. This is a great way to add a pop of color and sparkle without being too overwhelming.
- The Outer Corner Accent: Apply your glitter stick to the outer corner of your eye, blending it slightly into the crease. This adds a touch of drama and makes your eyes appear wider.
- The Creative Placement: Get creative! Use your sticks to create geometric shapes, abstract designs, or even just random dots of sparkle around your eyes.
(🎨 Emoji of a palette and brush 🎨) This look is perfect for expressing your individuality and experimenting with different makeup styles.
Troubleshooting & Common Mistakes (and How to Fix Them!)
Even the most seasoned makeup artists encounter hiccups. Here’s a breakdown of common issues and their solutions:
| Problem | Solution |
|---|---|
| Fallout City! (Glitter Everywhere) | Use a glitter primer! Seriously, it’s a game-changer. Also, apply glitter with a dabbing motion, not a swiping one. Clean up stray glitter with tape (masking or scotch tape works wonders). |
| Creasing Catastrophe | Apply your eyeshadow sticks in thin layers. Avoid applying too much product at once. Set with a translucent powder eyeshadow for extra hold. Consider using an eyeshadow primer underneath. |
| Uneven Application | Blend, blend, blend! Use a clean finger or a soft brush to blend the edges of the eyeshadow sticks. Build up the intensity gradually, rather than applying a thick layer all at once. |
| Color Doesn’t Pop | Layer your eyeshadow sticks over a base color. A matte black or brown eyeshadow can help to make the colors appear more vibrant. Use a white eyeshadow base for pastel shades. |
| Looks Muddy/Dull | Avoid using too many colors at once. Stick to a maximum of three or four shades. Blend thoroughly between each layer. Use a highlight shade in the inner corner of your eye to brighten the look. |
| Eyeliner Stick Keeps Breaking | Don’t extend the stick too far! Only extend as much product as you need. Warm the tip of the stick slightly before applying (with your fingers, not a lighter!). Store your sticks in a cool, dry place. |
(😅 Emoji of a face with a sweat drop 😅) Okay, we’ve all been there. Don’t panic!
The Importance of Tools (Beyond the Sticks!)
While the sticks themselves are the stars of the show, a few key tools can make all the difference:
- Eyeshadow Primer: Essential for preventing creasing and ensuring long-lasting wear.
- Blending Brush: A soft, fluffy brush is ideal for blending out the edges of your eyeshadow sticks and creating a seamless transition between colors.
- Small, Stiff Brush: Perfect for applying glitter with precision and packing it onto the lid.
- Eyelash Curler: Curling your lashes before applying mascara will open up your eyes and make them appear larger.
- Mascara: Adds volume, length, and definition to your lashes.
- Makeup Remover: Because even the most fabulous makeup needs to come off at the end of the day. (Micellar water is your best friend!)
(🧰 Emoji of a toolbox 🧰) Consider these your essential eye makeup toolkit.
Beyond the Basics: Advanced Techniques (For the Daring!)
Feeling adventurous? Let’s push the boundaries of stick-based eye makeup!
- The Halo Eye: Apply a dark eyeshadow stick to the inner and outer corners of your lid, leaving the center bare. Apply a shimmer or glitter stick to the center of the lid to create a halo effect.
- The Cut Crease: Use a matte stick to create a sharp, defined crease. Apply a lighter shade of eyeshadow stick to the lid below the crease.
- The Graphic Liner: Use a metallic or glitter stick to create a bold, graphic eyeliner look. Experiment with different shapes and sizes.
- The Reverse Smoky Eye: Apply a dark eyeshadow stick to your lower lash line and blend it downwards. Keep the upper lid relatively bare.
- The Monochrome Look: Use the same eyeshadow stick on your lid, crease, and lower lash line for a simple, chic look.
(🚀 Emoji of a rocket 🚀) Prepare for liftoff to makeup mastery!
Choosing the Right Sticks for You: A Color Theory Crash Course
Color theory can seem intimidating, but it’s essential for creating flattering eye makeup looks. Here’s a simplified guide:
- Warm Skin Tones: Look for eyeshadow sticks in warm colors like gold, bronze, copper, brown, and peach.
- Cool Skin Tones: Look for eyeshadow sticks in cool colors like silver, blue, purple, and pink.
- Neutral Skin Tones: You can rock pretty much any color! Experiment and see what you like best.
- Eye Color Considerations:
- Blue Eyes: Warm colors like gold, bronze, and copper will make your blue eyes pop.
- Green Eyes: Purple, plum, and bronze will enhance your green eyes.
- Brown Eyes: You can wear almost any color! Experiment with different shades to find what you love.
- Hazel Eyes: Gold, green, and brown will bring out the different colors in your hazel eyes.
(🌈 Emoji of a rainbow 🌈) Embrace the power of color!
The Grand Finale: Practice Makes Perfect (and Glitter!)
The most important thing is to experiment and have fun! Don’t be afraid to try new techniques and color combinations. The more you practice, the better you’ll become at using your 5-piece stick set to create stunning eye makeup looks.
(🎉 Emoji of confetti 🎉) Go forth and glitterize the world, my friends! Remember, a little sparkle can make all the difference. And if all else fails, blame it on the fairies.
Table: Stick Set Shopping Guide
| Feature | Consideration |
|---|---|
| Pigmentation | Highly pigmented sticks will deliver more intense color with less product. Look for swatches and reviews online to gauge the pigmentation levels. |
| Blendability | Easy-to-blend formulas are essential for creating seamless transitions and avoiding harsh lines. Creamy textures tend to blend more easily than drier formulas. |
| Longevity | Look for sticks that are long-wearing and resistant to creasing. Consider using an eyeshadow primer to extend the wear time. |
| Color Range | Choose a set that offers a versatile range of colors that complement your skin tone and eye color. |
| Price Point | Eyeshadow stick sets range in price from drugstore to high-end. Consider your budget and prioritize quality over quantity. |
| Ingredient List | If you have sensitive skin or allergies, be sure to check the ingredient list before purchasing. Look for hypoallergenic and fragrance-free options. |
(🛍️ Emoji of a shopping bag 🛍️) Happy Shopping!
This lecture has hopefully armed you with the knowledge and inspiration to conquer the world of eye makeup enhancement with your trusty 5-piece stick set. Now, go forth and create some sparkly magic! And remember, when in doubt, add glitter!
(🎤 Emoji of a microphone 🎤) Class dismissed! Now go play with your makeup!
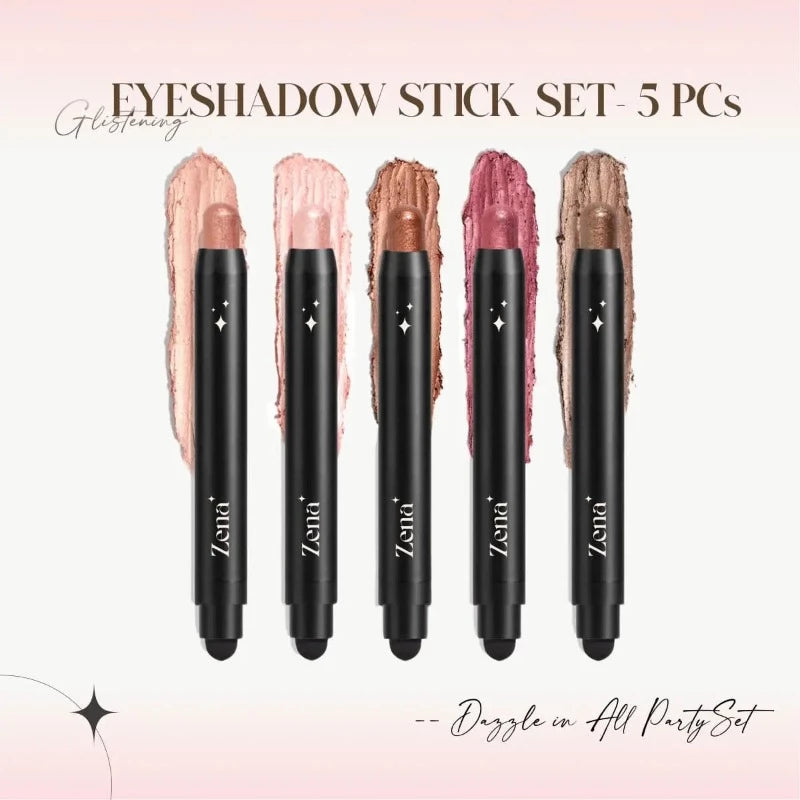
For detailed product specifications and purchases, please go to :https://zenamakeup.com/products/glimmer-glow-5-piece-glitter-cream-eyeshadow-stick-set
Leave a Reply