Traceless Matte Foundation Repair Stick: Your Secret Weapon for Concealer & Foundation Mastery (aka Bye-Bye Blemishes, Hello Flawless!)
(Lecture Hall Intro Music: Think upbeat jazz, maybe a little chaotic)
Alright, alright, settle down class! Welcome to Foundation 101: Advanced Techniques. Today, we’re diving deep into a subject that might just revolutionize your makeup game: Using the Traceless Matte Foundation Repair Stick as BOTH your concealer and your foundation!
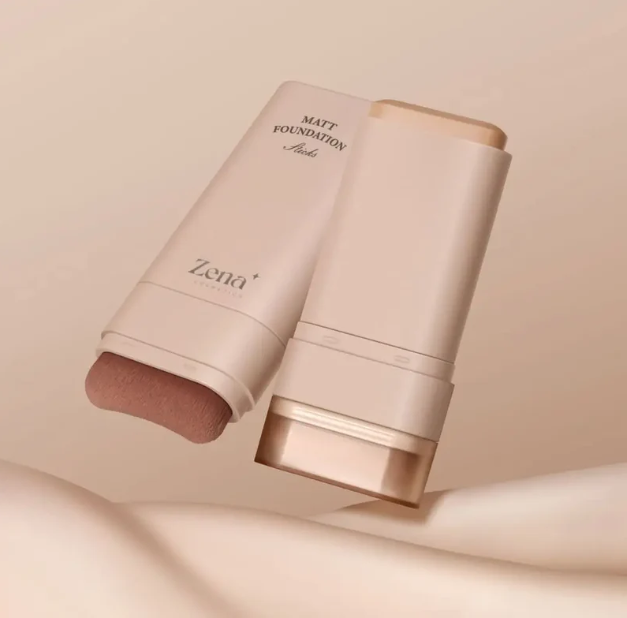
(Slide appears: Image of a Traceless Matte Foundation Repair Stick, gleaming under studio lights.)
Now, I know what you’re thinking. "A repair stick? Isn’t that just for, like, fixing disasters?" And to that, I say: My friend, you underestimate the sheer versatility of this magical little stick. Think of it less as a "Band-Aid" and more as a multi-tool, Swiss Army knife, and makeup artist rolled into one convenient, handbag-friendly package!
(Sound effect: A dramatic "Ta-da!" sound)
But before we get into the nitty-gritty, let’s address the elephant in the room:
Why use a foundation repair stick for everything?
(Slide: Image of a confused-looking elephant wearing a tiny makeup brush)
Great question! There are several compelling reasons:
- Efficiency is King/Queen/Royal Non-Binary Monarch: Less clutter, less time spent rummaging through your overflowing makeup bag. Imagine the sheer joy of streamlining your routine! More time for coffee, more time for conquering the world, less time battling rogue eyeshadow palettes. ☕👑🌍
- Precision Application: The stick format allows for targeted coverage. Think of it as a surgical strike against blemishes. No more accidental foundation smearing into your hairline!
- Buildability is Your BFF: You control the coverage. Sheer it out for a natural, "I woke up like this" vibe, or build it up for full glam. The power is in your hands! ✊
- Travel-Friendly Superstar: No more worrying about leaky foundations in your suitcase. This stick is TSA-approved and ready for adventure. ✈️
- Matte Finish Magic: Perfect for oily or combination skin, it keeps shine at bay without looking cakey. Say goodbye to midday shine attacks! ✨
- Cost-Effective Champion: One product, multiple uses. It’s like getting a buy-one-get-one-free deal, but without the awkward cashier interaction. 💰
The Foundation Repair Stick: An Anatomy Lesson
(Slide: A diagram of the foundation repair stick, highlighting key features like the tip, the swivel base, and the formulation.)
Let’s break down what makes this stick so special:
| Feature | Description | Benefit |
|---|---|---|
| Shape & Size | Compact, often bullet-shaped or rectangular. | Easy to hold, precise application, fits in any bag. |
| Formulation | Creamy, usually with a matte or semi-matte finish. Often includes skin-loving ingredients. | Blends seamlessly, provides coverage without feeling heavy, can improve skin texture over time. |
| Application | Direct application to the skin. | No need for brushes or sponges (though you can use them!), minimizes product waste. |
| Pigment Level | Varies, but generally buildable. | Customizable coverage, from sheer to full, depending on your needs. |
| Ingredients | Look for ingredients like hyaluronic acid, vitamins, and antioxidants. | Hydrates and protects the skin while providing coverage. |
Choosing Your Shade: The Goldilocks Principle (But with More Makeup)
(Slide: A spectrum of foundation shades, from very fair to very deep.)
Okay, this is crucial. Choosing the right shade is like finding the perfect pair of jeans – essential for comfort and confidence. Here’s how to nail it:
- Know Your Undertones: Are you warm (golden, yellow), cool (pink, blue), or neutral? This will guide your shade selection. Look at the veins on your wrist – blue/purple veins suggest cool undertones, green veins suggest warm undertones, and a mix suggests neutral. Or, think about what colors you usually wear that make you look great, do warm colors make your skin glow, or cool colors?
- Swatch Test: Apply a small amount of the stick to your jawline in natural light. The shade that disappears into your skin is the winner! Avoid testing on your hand, as the skin tone is often different from your face.
- Consider the Season: Your skin tone might change throughout the year. You might need a lighter shade in the winter and a darker shade in the summer.
- Don’t Be Afraid to Mix: If you’re between shades, don’t hesitate to mix two different sticks together to create your perfect match. You can also buy a color adjusting mixer to help lighten or darken a foundation.
Pro Tip: When in doubt, go slightly lighter. You can always add bronzer or contour to warm up your complexion.
Concealer Application: Erasing Imperfections Like a Pro
(Slide: Before-and-after photos showcasing the foundation repair stick used as a concealer.)
Now, let’s get down to business: using the foundation repair stick as a concealer. This is where the precision application really shines!
Areas to Target:
- Under-Eye Circles: Apply in an inverted triangle shape under your eyes, blending outwards. This brightens the area and makes you look like you actually slept (even if you stayed up all night binge-watching cat videos). 😹
- Blemishes & Redness: Dab directly onto the affected area and blend gently. Avoid rubbing, as this can irritate the skin. Think of it as a gentle, targeted strike. 🎯
- Hyperpigmentation: Apply to dark spots and blend outwards to even out your skin tone.
- Around the Nose: This area is prone to redness, so a little concealer can go a long way.
Application Techniques:
- Direct Application: Apply the stick directly to the skin, then blend with your finger, a brush, or a sponge.
- Brush Application: Use a small, dense concealer brush for precise application. This is great for covering small blemishes.
- Sponge Application: Use a damp beauty sponge for a seamless, airbrushed finish. This is ideal for blending under-eye concealer.
Blending is Key!
(Slide: Animated GIF showing proper blending techniques – stippling, patting, and circular motions.)
Blending is the secret sauce to a flawless finish. Don’t just smear the product around! Use gentle stippling, patting, or circular motions to blend the concealer seamlessly into your skin. A damp beauty sponge is your best friend here.
Setting Your Concealer:
Setting Your Concealer:
(Slide: Image of setting powder and a powder brush.)
To prevent creasing and keep your concealer in place all day, set it with a light dusting of translucent powder. Use a fluffy brush to gently apply the powder, focusing on the under-eye area and any areas prone to creasing.
Foundation Application: Building Your Perfect Canvas
(Slide: Before-and-after photos showcasing the foundation repair stick used as a foundation.)
Alright, time to create that flawless canvas! Using the foundation repair stick as your foundation is surprisingly easy.
Application Techniques:
- Direct Application: Apply the stick directly to your face, using short, even strokes. Focus on the areas that need the most coverage, such as the center of your face.
- Brush Application: Use a foundation brush (either flat or stippling) to blend the product outwards. This is great for achieving a medium coverage.
- Sponge Application: Use a damp beauty sponge for a sheer to medium coverage and a natural, dewy finish.
Building Coverage:
- Start Sheer: Apply a thin layer of foundation to your entire face, then build up the coverage in areas that need it. This prevents a cakey look.
- Focus on the Center of Your Face: Most people need the most coverage in the center of their face, around the nose and mouth. Blend outwards towards the hairline and jawline.
- Blend, Blend, Blend! Seriously, I can’t stress this enough. Blending is crucial for a natural-looking finish.
Pro Tip: If you want a more dewy finish, mix a drop of facial oil into the foundation before applying it.
Setting Your Foundation:
(Slide: Image of setting spray and a setting powder, with a woman applying both.)
To keep your foundation in place all day and prevent shine, set it with a setting powder or setting spray.
- Setting Powder: Use a large, fluffy brush to apply a light dusting of translucent powder to your entire face. Focus on the T-zone (forehead, nose, and chin), which is prone to oiliness.
- Setting Spray: Hold the bottle about 8-10 inches away from your face and spray evenly. This will help to meld the foundation and powder together and create a more natural finish.
Troubleshooting: Common Mistakes and How to Fix Them
(Slide: A series of humorous images depicting common makeup mistakes, like cakey foundation and overly dark concealer.)
Even with the best techniques, mistakes can happen. Here’s how to troubleshoot some common problems:
| Problem | Cause | Solution |
|---|---|---|
| Cakey Foundation | Applying too much product, using the wrong formula for your skin type | Use a damp beauty sponge to blend the foundation, exfoliate regularly, use a hydrating primer. |
| Creasing Concealer | Not setting with powder, using a too-thick formula | Set with a light dusting of translucent powder, use a thinner concealer formula, hydrate under eyes. |
| Uneven Application | Not blending properly, using the wrong brush | Blend with a damp beauty sponge, use a stippling brush, take your time. |
| Shine Breakthrough | Oily skin, not using a mattifying primer or setting powder | Use a mattifying primer, set with a mattifying powder, carry blotting papers. |
| Color Doesn’t Match | Wrong shade selection | Re-evaluate your undertones, swatch test in natural light, consider the season. |
Advanced Techniques: Taking Your Game to the Next Level
(Slide: Images of more complex makeup looks, like contouring and highlighting.)
Once you’ve mastered the basics, you can start experimenting with more advanced techniques:
- Contouring: Use a foundation repair stick that is 2-3 shades darker than your skin tone to create shadows and define your features. Apply to the hollows of your cheeks, along your jawline, and on the sides of your nose. Blend well!
- Highlighting: Use a foundation repair stick that is 1-2 shades lighter than your skin tone to highlight the high points of your face, such as your cheekbones, brow bone, and the bridge of your nose.
- Color Correcting: Use a colored concealer (peach, green, or yellow) to neutralize discoloration before applying your foundation. Peach cancels out blue/purple tones (under-eye circles), green cancels out redness (blemishes), and yellow cancels out dullness.
Conclusion: Embrace the Power of the Stick!
(Slide: Image of a confident person rocking a flawless makeup look, using the foundation repair stick.)
The Traceless Matte Foundation Repair Stick is a versatile and convenient tool that can simplify your makeup routine and help you achieve a flawless complexion. Don’t be afraid to experiment and find what works best for you. With a little practice, you’ll be a pro in no time!
(Sound effect: Applause and cheering)
Now, go forth and conquer the world, one perfectly blended application at a time! Class dismissed!
(Lecture Hall Outro Music: Upbeat and triumphant)
For detailed product specifications and purchases, please go to :https://zenamakeup.com/products/traceless-matte-foundation-repair-stick
Leave a Reply