Traceless Matte Foundation Repair Stick: Your Secret Weapon for Sculpted Perfection (A Hilariously Helpful Lecture)
Alright, glamour goblins and beauty besties! 🧙♀️✨ Welcome, welcome, welcome to "Contour & Highlight 101: Repair Stick Remix!" Today, we’re ditching the dusty rulebook and diving headfirst into the unexpected world of using the Traceless Matte Foundation Repair Stick for contouring and highlighting. Yes, you heard that right! We’re taking a product designed for fixing boo-boos and turning it into our sculpting superhero.
(Disclaimer: I’m not a licensed makeup artist. I’m just a passionate beauty enthusiast with a penchant for puns and a healthy obsession with cheekbones. Use this knowledge responsibly and always patch test!)
Why This Lecture? Because Life’s Too Short for Boring Makeup!
Look, the makeup industry is overflowing with products. Contouring kits, highlighting palettes, shimmery sticks… it’s enough to make your head spin faster than a Kardashian’s revolving door. 😵💫 But what if I told you that you probably already own a hidden gem that can deliver a perfectly sculpted and highlighted look? That’s where our trusty Traceless Matte Foundation Repair Stick comes in.
Lecture Outline: From Fumble to Fabulous!
- What is the Traceless Matte Foundation Repair Stick? (And Why Should We Care?) – Demystifying the product and its potential.
- The Contour & Highlight Lowdown: A Crash Course for Beginners (and Refreshers for Pros!) – Understanding the basics of light and shadow.
- Choosing Your Shade: The Goldilocks Principle (Not Too Dark, Not Too Light, Just Right!) – Avoiding the dreaded "dirt stripe" effect.
- Application Techniques: Master the Art of the Swipe, Blend, and Stipple! – Step-by-step guide to contouring and highlighting with the Repair Stick.
- Blending Like a Boss: The Secret to a Seamless Finish! – Tools, techniques, and tips for a flawless blend.
- Troubleshooting: Fixing Common Mistakes (Because We All Make Them!) – Dealing with patchiness, over-contouring, and other makeup mishaps.
- Highlighting Hacks: Level Up Your Glow Game! – Exploring different placement options and techniques for a killer highlight.
- Setting Your Look: Locking in the Perfection! – Powders, sprays, and everything in between.
- Beyond the Basics: Advanced Techniques and Creative Applications! – Experimenting with different contouring styles and placements.
- Final Thoughts: Embracing the Unexpected and Owning Your Unique Beauty! – Recap and encouragement to experiment and have fun.
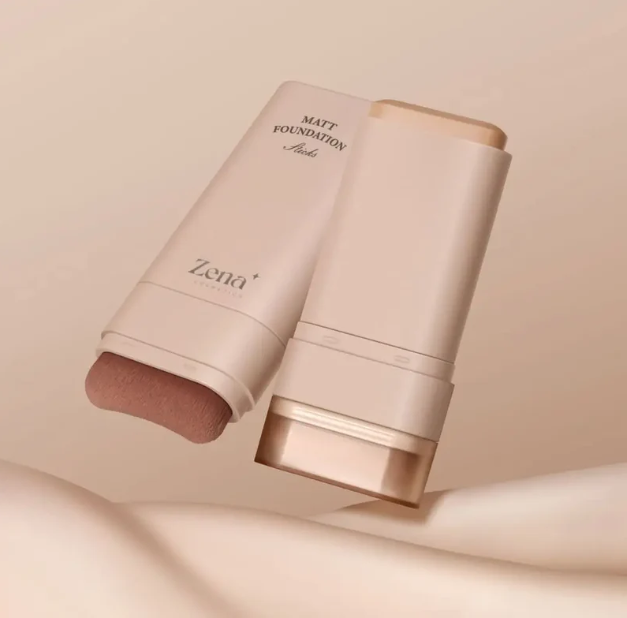
1. What is the Traceless Matte Foundation Repair Stick? (And Why Should We Care?)
Okay, let’s get acquainted with our star of the show. The Traceless Matte Foundation Repair Stick is typically marketed as a targeted concealer or a quick fix for blemishes and imperfections. It’s designed to blend seamlessly into the skin, providing buildable coverage with a matte finish.
But here’s the kicker: The matte finish and precise application of the stick make it an ideal tool for contouring and highlighting!
- Precisely Targeted: The stick format allows for controlled application, meaning you can place the product exactly where you want it. No more accidentally painting your entire cheek with contour! 🖌️❌
- Matte Finish: The matte finish mimics the natural shadows on your face, creating a believable and sculpted look. Bye-bye, sparkly contour! ✨👋
- Buildable Coverage: You can start with a subtle contour and build up the intensity as needed. Perfect for beginners and pros alike!
- Travel-Friendly: Small and compact, it’s the perfect on-the-go sculpting solution. TSA-approved and ready for adventure! ✈️🌍
2. The Contour & Highlight Lowdown: A Crash Course for Beginners (and Refreshers for Pros!)
Think of contouring and highlighting as playing with light and shadow to sculpt and define your features.
- Contouring: Creating shadows to recede areas and add definition. It’s like drawing in your cheekbones… but with makeup! 🎨
- Highlighting: Bringing light to the high points of your face to make them appear more prominent. Hello, cheekbones! 👋
| Feature | Contouring | Highlighting |
|---|---|---|
| Purpose | Create depth, define, sculpt | Emphasize, brighten, lift |
| Color | Cool-toned, matte, 1-2 shades darker than skin | Lighter than skin, often with shimmer or sheen |
| Placement | Under cheekbones, jawline, temples, sides of nose | Cheekbones, brow bone, bridge of nose, cupid’s bow |
| Desired Effect | Slimming, defined, sculpted | Glowing, lifted, radiant |
Key Areas to Contour and Highlight:
- Cheekbones: The classic contour spot! Creates the illusion of higher, more defined cheekbones.
- Jawline: Defines the jaw and can create a more sculpted look.
- Temples: Adds depth to the forehead and can visually narrow the face.
- Sides of Nose: Creates a slimmer, more refined nose shape (optional).
- Brow Bone: Lifts the brow and opens up the eyes.
- Cupid’s Bow: Accentuates the shape of the lips.
- Bridge of Nose: Creates a longer, more defined nose.
3. Choosing Your Shade: The Goldilocks Principle (Not Too Dark, Not Too Light, Just Right!)
Choosing the right shade for contouring and highlighting with the Repair Stick is crucial. We want to avoid the dreaded "dirt stripe" or looking like you accidentally smeared chocolate on your face. 🍫🙅♀️
Contour Shade:
- 1-2 Shades Darker: Aim for a shade that’s only slightly darker than your natural skin tone. Too dark, and you’ll look muddy.
- Cool-Toned: This is key! Cool-toned shades mimic the natural shadows on your face. Avoid warm, orange-toned shades, which can look unnatural.
- Test It Out: Swatch the Repair Stick on your jawline in natural light to see how it looks.
Highlight Shade:
- 1-2 Shades Lighter: Choose a shade that’s slightly lighter than your skin tone.
- Undertones Matter: Consider your skin’s undertones. If you have warm undertones, a golden or peachy highlight will look great. If you have cool undertones, a pink or champagne highlight will be more flattering.
- Shimmer or Sheen (Optional): You can use a highlighting shade with a subtle shimmer or sheen for extra glow, or stick to a matte finish for a more natural look.
Pro Tip: If you’re unsure, it’s always better to err on the side of caution and choose a shade that’s slightly lighter or less pigmented. You can always build up the intensity!
4. Application Techniques: Master the Art of the Swipe, Blend, and Stipple!
Now for the fun part! Let’s get down to the nitty-gritty of applying the Repair Stick for contouring and highlighting.
Contouring:
- Prep Your Skin: Start with a clean, moisturized face. Apply your foundation and concealer as usual.
- Locate Your Cheekbones: Suck in your cheeks to find the hollows of your cheekbones. This is where you’ll apply the contour.
- Swipe It On: Using the Repair Stick, draw a line along the hollow of your cheekbone, starting from your ear and stopping about two fingers’ width away from your mouth.
- Blend, Blend, Blend: Use a blending brush, sponge, or your fingers to blend the contour upwards towards your hairline.
- Jawline Contouring (Optional): Apply a thin line of contour along your jawline to define it. Blend downwards towards your neck.
- Temples Contouring (Optional): Apply a small amount of contour to your temples to add depth. Blend outwards towards your hairline.
- Nose Contouring (Optional): Apply thin lines of contour down the sides of your nose to create a slimmer appearance. Blend carefully.
Highlighting:
- Prep Your Skin: Ensure your base makeup is complete.
- Apply to High Points: Using the Repair Stick, apply the highlight to the high points of your face:
- Cheekbones: Above your contour, blending towards your temples.
- Brow Bone: Under your eyebrow arch.
- Bridge of Nose: A thin line down the center of your nose.
- Cupid’s Bow: Above your upper lip.
- Blend, Blend, Blend: Use a blending brush, sponge, or your fingers to blend the highlight seamlessly into your skin.
Tools of the Trade:
| Tool | Purpose | Pro Tip |
|---|---|---|
| Blending Brush | Blending contour and highlight | Choose a fluffy brush for a soft, diffused look. |
| Beauty Sponge | Blending cream products seamlessly | Dampen the sponge for a more natural finish. |
| Fingers | For precise application and blending small areas | Use a light tapping motion for a seamless blend. |
5. Blending Like a Boss: The Secret to a Seamless Finish!
Blending is the key to a natural-looking contour and highlight. A poorly blended contour can look harsh and unnatural.
Tips for Seamless Blending:
- Start Light: Apply a small amount of product and build up the intensity as needed. It’s easier to add more product than to take it away!
- Use the Right Tools: Invest in a good quality blending brush or sponge.
- Blend in Circular Motions: Use gentle, circular motions to blend the product into your skin.
- Don’t Drag: Avoid dragging the product across your face, as this can create streaks.
- Check Your Work: Step back from the mirror and check your blending in natural light.
6. Troubleshooting: Fixing Common Mistakes (Because We All Make Them!)
We all make makeup mistakes. Don’t panic! Here’s how to fix some common contouring and highlighting mishaps:
| Mistake | Solution |
|---|---|
| Harsh Contour | Blend, blend, blend! Use a clean blending brush to soften the edges. |
| Muddy Contour | Use a lighter hand when applying the contour. Use a brightening powder. |
| Over-Highlighting | Use a clean blending brush to diffuse the highlight. |
| Patchy Application | Exfoliate your skin regularly to remove dead skin cells. |
| Wrong Shade | Experiment with different shades to find the perfect match for your skin. |
7. Highlighting Hacks: Level Up Your Glow Game!
Ready to take your highlight to the next level? Here are some highlighting hacks to try:
- Wet Your Brush: Dampen your blending brush before applying highlight for a more intense glow.
- Layer Highlights: Layer a powder highlight over a cream highlight for a multi-dimensional effect.
- Inner Corner Highlight: Apply a small amount of highlight to the inner corners of your eyes to brighten them up.
- Body Highlighting: Apply highlight to your collarbones, shoulders, and décolletage for a radiant glow.
8. Setting Your Look: Locking in the Perfection!
Setting your makeup is essential for keeping your contour and highlight in place all day long.
Setting Powders:
- Translucent Powder: Sets your makeup without adding color.
- Pressed Powder: Provides extra coverage and mattifies the skin.
- Setting Powder with Color: Adds a touch of color and can help to brighten the skin.
Setting Sprays:
- Matte Setting Spray: Controls oil and keeps your makeup in place.
- Dewy Setting Spray: Adds a radiant glow to the skin.
9. Beyond the Basics: Advanced Techniques and Creative Applications!
Once you’ve mastered the basics, you can start experimenting with different contouring styles and placements:
- Sculpting for Different Face Shapes: Learn how to contour and highlight based on your unique face shape.
- Contouring with Different Products: Explore contouring with powders, creams, and liquids.
- Creative Highlighting: Experiment with different colors and textures of highlighter.
10. Final Thoughts: Embracing the Unexpected and Owning Your Unique Beauty!
Congratulations! You’ve officially completed "Contour & Highlight 101: Repair Stick Remix!" 🎉
Remember, makeup is all about experimentation and having fun. Don’t be afraid to try new things and find what works best for you. Embrace your unique beauty and own your look!
The Traceless Matte Foundation Repair Stick is a versatile tool that can be used for much more than just covering blemishes. With a little creativity and practice, you can use it to create a perfectly sculpted and highlighted look. So go forth, my beautiful friends, and contour to your heart’s content! And remember, if all else fails, blame it on the lighting. 😉
Now go forth and conquer the world, one sculpted cheekbone at a time! 💋
For detailed product specifications and purchases, please go to :https://zenamakeup.com/products/traceless-matte-foundation-repair-stick
Leave a Reply