Lecture: The Art of Shimmering Skin: How Vanilla Shimmer Body Oil Can Transform Your Photos (and Your Confidence!) ✨
Alright, class, settle down, settle down! Today, we’re not dissecting frogs or memorizing the periodic table (thank goodness, right?). Instead, we’re diving headfirst into the glamorous world of radiant skin and its photographic power! Specifically, we’re unlocking the secrets of using Vanilla Shimmer Body Oil to make your skin absolutely glow in photos.
Forget filters! Forget expensive retouching! We’re going au naturel (well, almost) with a little help from our friend, the shimmer. Think of this lecture as your crash course in "Photogenic Skin 101," taught by yours truly, your professor of luminosity! 🌟
Course Outline:
- The Science of Shimmer: Why Does It Work? (We’ll keep it light, promise!)
- Vanilla Shimmer Body Oil: A Love Letter (and a Product Breakdown)
- Application Techniques: From Subtle Sparkle to Full-On Goddess Glow
- Lighting is Key: Maximizing Your Shimmer’s Impact
- Posing Like a Pro: Complimenting Your Radiance
- Troubleshooting: Avoiding Common Shimmer Mishaps (and Looking Like a Disco Ball)
- Beyond the Photos: The Real-Life Benefits of Shimmer Oil
- DIY Vanilla Shimmer Body Oil (For the Adventurous Souls)
- Q&A: Your Shimmering Questions Answered!
1. The Science of Shimmer: Why Does It Work? 🔬
Okay, let’s get a little nerdy. But don’t worry, I’ll keep the jargon to a minimum. The magic behind shimmer lies in light reflection.
Think of your skin as a surface. When light hits it, it can be absorbed, reflected, or scattered. Matte skin absorbs more light, making it appear flatter. Shimmer, however, is like tiny, microscopic mirrors strategically embedded in a luxurious oil. These little mirrors reflect light back out, creating that luminous, radiant effect.
Think of it like this:
| Skin Type | Light Absorption | Light Reflection | Appearance |
|---|---|---|---|
| Matte | High | Low | Flat, Non-Reflective |
| Shimmered | Low | High | Radiant, Glowing |
The smaller the shimmer particles, the more subtle the glow. Larger particles create a more intense, disco-ball effect (which, while fun, isn’t always what we’re going for in photos). Vanilla Shimmer Body Oil typically utilizes finely milled shimmer particles, providing a sophisticated and flattering radiance.
In short: Shimmer makes your skin look healthier, more vibrant, and just plain gorgeous by bouncing light around like a tiny, sparkly pinball machine! 🪩
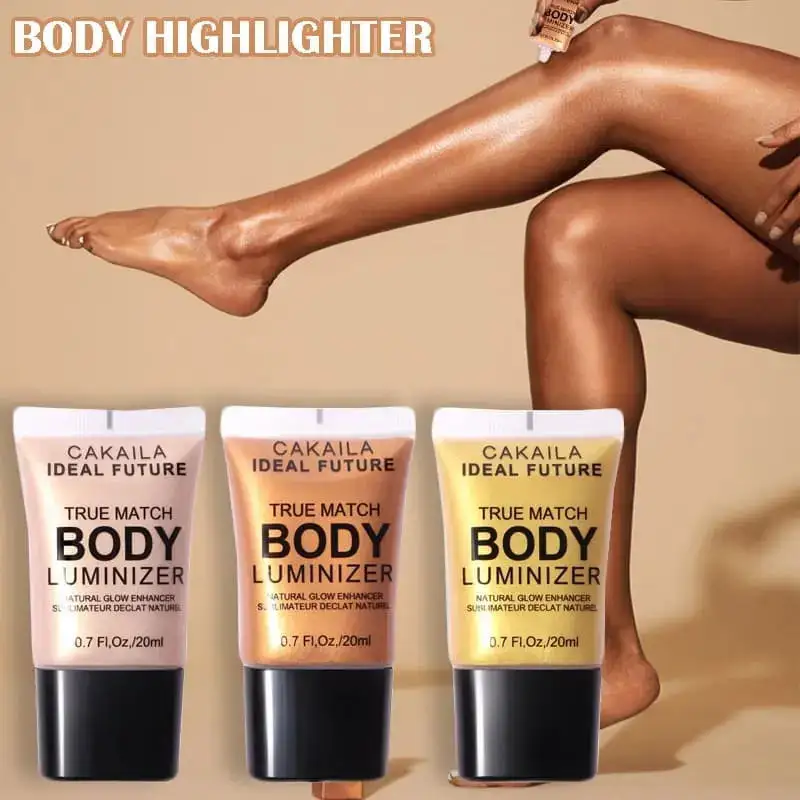
2. Vanilla Shimmer Body Oil: A Love Letter (and a Product Breakdown) 💌
Why Vanilla Shimmer Body Oil specifically? Well, aside from the fact that it smells delicious (who doesn’t love vanilla?), it offers a unique combination of benefits:
- Hydration: Body oils, in general, are fantastic moisturizers. They penetrate the skin deeply, leaving it feeling soft and supple. Dry, ashy skin is the enemy of a good photo!
- Shimmer: Obviously! We’ve already covered the light-reflecting magic.
- Vanilla Scent: Fragrance is powerful! A subtle vanilla scent can boost your confidence and make you feel pampered. Plus, it’s universally appealing. (Unless you’re allergic, in which case, proceed with caution!)
- Photographic Enhancement: The oil’s moisturizing properties smooth the skin’s surface, reducing the appearance of fine lines and imperfections. The shimmer then adds that coveted glow, making you look like you’ve been lit by a professional.
Key Ingredients to Look For:
| Ingredient | Benefit | Why It Matters for Photos |
|---|---|---|
| Carrier Oils (e.g., Almond Oil, Jojoba Oil, Coconut Oil, Sunflower Oil) | Deeply moisturizing, nourishing, and easily absorbed. | Hydrated skin reflects light better and looks smoother. |
| Fine Milled Shimmer Particles (Mica, Titanium Dioxide) | Provide the radiant glow. | The quality and size of the particles determine the subtlety or intensity of the shimmer. Finely milled is key for a natural look. |
| Vanilla Extract/Oil | Provides the pleasant scent and has antioxidant properties. | A pleasant scent boosts confidence, which translates to better posing and a more relaxed expression. |
| Vitamin E | Antioxidant that protects the skin from damage. | Helps maintain healthy, youthful-looking skin, which photographs beautifully. |
Pro Tip: Always do a patch test before applying any new product all over your body. Nobody wants a surprise allergic reaction on photo day! 🚨
3. Application Techniques: From Subtle Sparkle to Full-On Goddess Glow ✨
Alright, let’s get practical! How do we actually use this magical elixir?
The Key is Layering and Blending.
- Less is More (to Start): Begin with a small amount of oil in your palm. Remember, you can always add more, but it’s harder to take away!
- Warm It Up: Rub the oil between your palms to warm it up slightly. This helps it spread more evenly and absorb better.
- Targeted Application: Focus on areas that catch the light naturally:
- Shoulders and Collarbones: These are prime real estate for shimmer! They instantly create a sculpted and elegant look.
- Arms and Legs: Apply along the length of your limbs, paying extra attention to the shins and inner arms. This creates a long, lean effect.
- Décolletage: A little shimmer on your chest can enhance your cleavage and make you look incredibly alluring.
- Cheekbones: (Yes, you can use it on your face! But proceed with extreme caution and use a tiny amount. Avoid getting it in your eyes!) A dab on the cheekbones can create a dewy, highlighted effect.
- Blend, Blend, Blend! This is crucial! Use your hands to massage the oil into your skin until it’s evenly distributed and there are no harsh lines or streaks.
- Layer for Intensity: If you want a more dramatic shimmer, apply a second (or even third) thin layer. Just be careful not to overdo it! You want to look radiant, not greasy.
Application Tools (Optional):
- Makeup Brush (for face): A soft, fluffy brush can help you apply the oil precisely to your cheekbones.
- Sponge/Applicator Pad (for body): Helps even distribution of product.
- Your Own Hands: Your hands are a perfect and free option!
Application Levels:
| Level | Description | Occasion | Application Technique |
|---|---|---|---|
| Subtle Sparkle | A hint of radiance. | Everyday wear, natural photos, casual events. | One thin layer, focusing on key areas. |
| Goddess Glow | A noticeable, but still elegant, shimmer. | Photoshoots, parties, special occasions. | Two to three thin layers, blended thoroughly. |
| Disco Ball | Maximum shimmer intensity. | Halloween costumes, themed parties, when you want to be the center of attention. (Use with caution!) | Multiple layers, liberally applied. |
4. Lighting is Key: Maximizing Your Shimmer’s Impact 💡
Lighting is the best friend of shimmer! The right lighting can amplify your glow and make you look like a million bucks. The wrong lighting can make you look like you’re covered in glitter glue.
Best Lighting for Shimmer:
- Natural Light (Golden Hour): This is the holy grail of lighting! The warm, soft light of sunrise and sunset will make your skin look absolutely stunning.
- Soft, Diffused Lighting: Avoid harsh, direct light, which can accentuate imperfections and make the shimmer look unnatural. Use a diffuser or bounce the light off a wall to create a softer effect.
- Warm Lighting: Warm tones tend to flatter shimmer better than cool tones.
Lighting to Avoid:
- Harsh, Direct Sunlight: This can make your skin look oily and highlight any imperfections.
- Fluorescent Lighting: This can wash you out and make the shimmer look cheap.
- Flash Photography (Sometimes): Flash can sometimes wash out the shimmer, but with the right technique, it can also create a dramatic, high-glamour effect. Experiment to see what works best for you.
Pro Tip: Experiment with different lighting setups to see how the shimmer looks on your skin. Take photos in various lighting conditions and adjust your application accordingly.
5. Posing Like a Pro: Complimenting Your Radiance 💃
Shimmered skin is a great start, but the right pose can take your photos to the next level.
Posing Tips:
- Angles are Your Friend: Experiment with different angles to find the ones that flatter your figure and showcase your shimmer.
- Highlight Your Best Features: If you love your shoulders, show them off! If you have great legs, flaunt them!
- Relax and Be Confident: Confidence is the most attractive thing you can wear. Relax your shoulders, smile genuinely, and own your radiance!
- Move Naturally: Don’t be afraid to move around and let the light catch your shimmer. Dynamic poses often look more natural and engaging.
- Practice Makes Perfect: Practice posing in front of a mirror to find your best angles and expressions.
Poses to Showcase Shimmer:
- Shoulder Pose: A simple pose where you turn your shoulder slightly to the camera, highlighting the shimmer on your collarbone and shoulder.
- Arm Extension: Extending your arm out to the side can show off the shimmer on your arm.
- Leg Cross: Crossing your legs can emphasize the shimmer on your shins.
- The "Look Back": Looking back over your shoulder allows the light to catch the shimmer on your back and shoulders.
Remember: The best pose is the one that makes you feel confident and comfortable.
6. Troubleshooting: Avoiding Common Shimmer Mishaps (and Looking Like a Disco Ball) 🚫
6. Troubleshooting: Avoiding Common Shimmer Mishaps (and Looking Like a Disco Ball) 🚫
Even with the best intentions, things can sometimes go wrong. Here are some common shimmer mistakes and how to avoid them:
- Too Much Shimmer: This is the most common mistake! It’s easy to get carried away, but remember, less is often more.
- Solution: If you’ve applied too much, blot the excess oil with a tissue.
- Uneven Application: Streaks and patches of shimmer can look messy and unflattering.
- Solution: Blend, blend, blend! Use your hands or a sponge to ensure even distribution.
- Shimmer Migration: Shimmer can sometimes transfer to clothing, furniture, or other people.
- Solution: Allow the oil to fully absorb into your skin before getting dressed. Wear loose-fitting clothing to avoid rubbing.
- Oily Skin: If you have naturally oily skin, shimmer oil can make you look even more greasy.
- Solution: Use a mattifying primer before applying the oil. Apply the oil sparingly and only to areas that need extra radiance.
- Shimmer in Unflattering Areas: Avoid applying shimmer to areas with cellulite or wrinkles, as it can accentuate them.
- Solution: Focus on smooth, toned areas of your body.
The Golden Rule: When in doubt, err on the side of caution. You can always add more shimmer, but it’s harder to take away.
7. Beyond the Photos: The Real-Life Benefits of Shimmer Oil ✨ IRL
While we’re focusing on photographic benefits, let’s not forget the real-life advantages of using Vanilla Shimmer Body Oil:
- Hydrated, Healthy Skin: The moisturizing properties of the oil will leave your skin feeling soft, smooth, and nourished.
- Subtle Fragrance: The vanilla scent can boost your confidence and make you feel pampered.
- Enhanced Confidence: When you look good, you feel good! Shimmer oil can give you a little extra boost of confidence, whether you’re posing for photos or just going about your day.
- A Touch of Glamour: Shimmer oil adds a touch of glamour to any occasion. It’s a simple way to feel more special and put-together.
8. DIY Vanilla Shimmer Body Oil (For the Adventurous Souls) 🧪
Feeling crafty? You can easily make your own Vanilla Shimmer Body Oil at home!
Ingredients:
- 1/2 cup Carrier Oil (Almond Oil, Jojoba Oil, or Coconut Oil)
- 1-2 teaspoons Mica Powder (Choose a color that complements your skin tone)
- 1/2 teaspoon Vanilla Extract
- Optional: A few drops of Vitamin E Oil
Instructions:
- In a small bowl, combine the carrier oil, mica powder, and vanilla extract.
- Stir well until the mica powder is evenly dispersed.
- Add the Vitamin E oil (if using).
- Pour the mixture into a clean, airtight container.
- Shake well before each use.
Tips for DIY Success:
- Choose High-Quality Ingredients: The quality of your ingredients will affect the final product.
- Experiment with Colors: You can mix different colors of mica powder to create a custom shade.
- Start Small: Make a small batch first to test the recipe and adjust the ingredients to your liking.
- Store Properly: Store your DIY shimmer oil in a cool, dark place to prevent it from going rancid.
Disclaimer: When making your own products, always be mindful of allergies and sensitivities.
9. Q&A: Your Shimmering Questions Answered! 🤔
Alright, class! It’s time for your burning questions. Don’t be shy! No question is too silly when it comes to achieving radiant skin.
(Professor mimics raising hand and asking a question in a silly voice)
"Professor, can I use shimmer oil on my face if I have acne?"
Excellent question! While you can use it sparingly on your cheekbones as a highlighter, proceed with caution. If you have acne-prone skin, it’s best to avoid applying shimmer oil to areas where you’re prone to breakouts. Opt for a non-comedogenic highlighter instead.
(Another student raises their hand)
"Professor, what if I’m going to be sweating a lot? Will the shimmer oil run?"
Another great question! Shimmer oil can potentially run if you’re sweating excessively. If you know you’ll be sweating, opt for a lighter application or consider using a waterproof shimmer lotion instead.
(One last question from the back row)
"Professor, what’s your favorite brand of Vanilla Shimmer Body Oil?"
(Professor winks)
Well, class, I can’t endorse any specific brands, but I encourage you to do your research and find a product that suits your skin type, budget, and personal preferences. Look for high-quality ingredients, a pleasant scent, and finely milled shimmer particles.
Conclusion:
Congratulations, class! You’ve officially graduated from "Photogenic Skin 101"! Armed with the knowledge of shimmer science, application techniques, and posing tips, you’re ready to transform your photos (and your confidence!) with the magic of Vanilla Shimmer Body Oil.
Now go forth and glow! ✨
(Professor strikes a glamorous pose)
Class dismissed!
For detailed product specifications and purchases, please go to :https://zenamakeup.com/products/vanilla-shimmer-body-oil-fragrant-glitter-glow-moisturizer
Leave a Reply