🎓 ZenaMakeup University Presents: Brow Boot Camp 101 – Conquer Thin Brows with Our 3-in-1 Waterproof Wonder! 🎓
Welcome, Brow Babes and Beaus! 👋 I’m your Professor of Perfect Brows, here to guide you through the treacherous terrain of thin eyebrows. Are you tired of looking in the mirror and seeing… well, less brow than you’d hoped for? Do you yearn for the days when thick, luscious brows were all the rage (spoiler alert: they still are!)? Fear not, my friends, because ZenaMakeup has the answer!
Today, we’re diving deep into the revolutionary ZenaMakeup 3-in-1 Waterproof Brow Architect: Your Secret Weapon for Voluminous, Defined, and Unflinchingly Flawless Brows. Forget fiddling with multiple products and stressing about smudges – this little wonder does it all!
(Cue dramatic music and spotlight) 🎶
Lecture Outline:
- The Brow Struggle is Real (and Understandable): Understanding the causes of thin brows and why they matter. (😔➡️😊)
- Introducing the Star of the Show: ZenaMakeup’s 3-in-1 Waterproof Brow Architect. (✨)
- Decoding the 3-in-1 Magic: A Step-by-Step Breakdown. (🔍)
- Step 1: Volumizing Fibers – Building the Foundation. (🧱)
- Step 2: Defining Pencil – Sculpting Your Masterpiece. (✏️)
- Step 3: Setting Gel – Locking in the Perfection. (🔒)
- Why Waterproof? The Importance of Long-Lasting Brow Power. (💧)
- Choosing Your Perfect Shade: Finding Your Brow BFF. (🎨)
- Application Tips & Tricks: From Beginner to Brow Boss. (🏆)
- Troubleshooting Common Brow Blunders: Avoiding the Pitfalls. (🚧)
- The ZenaMakeup Promise: Quality, Cruelty-Free, and Confidence-Boosting. (💖)
- Q&A Session: Ask the Professor Anything! (❓)
1. The Brow Struggle is Real (and Understandable):
Let’s be honest, thin brows can be a real downer. They can make you look older, less defined, and just… blah. But why do some of us suffer from sparse brow situations while others are blessed with Cara Delevingne-esque caterpillars? Here are a few common culprits:
- Over-Plucking/Waxing: We’ve all been there. The 90s called, and they want their over-plucked brows back! 😩 Repeatedly removing hairs from the follicle can damage it, hindering regrowth.
- Aging: As we age, hair follicles naturally shrink, leading to thinner hair all over, including our brows.👵
- Medical Conditions: Certain medical conditions and medications can contribute to hair loss. If you suspect this is the case, consult with your doctor. 🩺
- Genetics: Sometimes, it’s just in the cards! Thanks, Mom and Dad! 🧬
Why do brows matter, anyway?
Brows are more than just furry caterpillars above our eyes. They frame our face, enhance our expressions, and can even make us look younger and more awake. They’re the unsung heroes of facial harmony! Think of them as the curtains to the window of your soul… you wouldn’t want tattered, sparse curtains, would you? 😉
| Problem | Solution |
|---|---|
| Over-Plucked Brows | Give them a break! Let them grow back (as much as possible). |
| Aging Brows | Embrace brow-enhancing products like our 3-in-1 wonder! |
| Medical-Related Thinning | Consult your doctor to address the underlying issue. |
| Genetic Predisposition | Learn to work with what you’ve got (and enhance it with ZenaMakeup!). |
2. Introducing the Star of the Show: ZenaMakeup’s 3-in-1 Waterproof Brow Architect!
(Drumroll, please!) 🥁
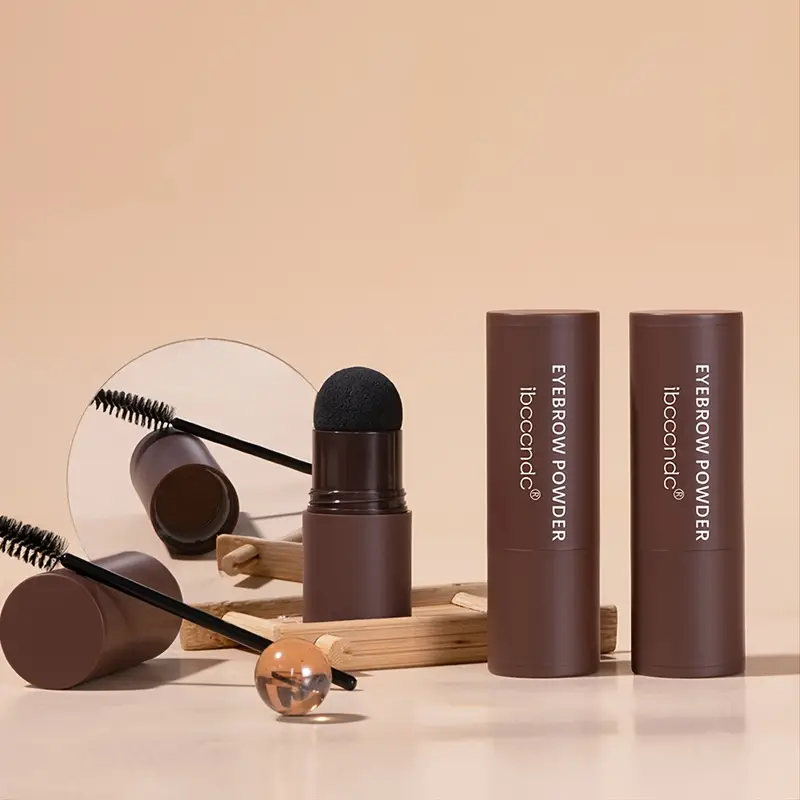
Ladies and gentlemen, boys and girls, may I present to you the ZenaMakeup 3-in-1 Waterproof Brow Architect! This isn’t just another brow product; it’s a complete brow transformation in a single, sleek package. We’ve meticulously crafted this formula to address the specific needs of thin brows, delivering volume, definition, and long-lasting wear.
(Image of the product here, looking glamorous!)
What makes it so special?
- 3-in-1 Functionality: Volumizing fibers, defining pencil, and setting gel – all in one convenient tool.
- Waterproof Formula: Sweat-proof, smudge-proof, and life-proof! No more worrying about your brows disappearing mid-day. 💦
- Natural-Looking Results: Creates believable, feathered brows that enhance your natural features.
- Easy to Use: Even for beginners, achieving flawless brows is a breeze.
- Available in a Range of Shades: Find your perfect match and create a customized look.
3. Decoding the 3-in-1 Magic: A Step-by-Step Breakdown
Let’s break down each component of the Brow Architect and how they work together to create brow perfection.
Step 1: Volumizing Fibers – Building the Foundation (🧱)
Think of the volumizing fibers as tiny little brow extensions. These microscopic fibers cling to your existing brow hairs (or even your skin) to instantly add fullness and thickness.
- How it works: The fibers are suspended in a tinted gel formula that adheres to the brow hairs, creating the illusion of more volume.
- Application: Use the wand to brush the fibers through your brows, focusing on sparse areas. Apply in short, upward strokes to mimic natural hair growth.
- Pro Tip: Don’t overload the wand! A little goes a long way. Start with a light layer and build up as needed.
(Image or GIF showing the application of the volumizing fibers)
Step 2: Defining Pencil – Sculpting Your Masterpiece (✏️)
Now that we’ve built the foundation, it’s time to add definition and shape. The defining pencil allows you to create precise lines and fill in any remaining gaps.
- How it works: The fine-tipped pencil allows for precise application, mimicking the look of individual brow hairs. The formula is creamy and blendable, ensuring a natural finish.
- Application: Use short, feathery strokes to fill in sparse areas and define the shape of your brows. Focus on the arch and tail of the brow for maximum impact.
- Pro Tip: Keep the pencil sharp for optimal precision. Use a light hand to avoid harsh lines.
(Image or GIF showing the application of the defining pencil)
Step 3: Setting Gel – Locking in the Perfection (🔒)
The final step is crucial for ensuring your brows stay put all day long. The setting gel locks in the fibers and pencil, preventing smudging and fading.
- How it works: The clear gel formula coats the brow hairs, providing a flexible hold that keeps them in place. It also adds a subtle sheen for a polished look.
- Application: Use the spoolie to brush the gel through your brows, following the direction of hair growth. Make sure to coat all the hairs for maximum hold.
- Pro Tip: Don’t overdo it! Too much gel can make your brows look stiff. Use a light hand and focus on setting the shape.
(Image or GIF showing the application of the setting gel)
Table Summarizing the 3-in-1 Process:
| Step | Product Component | Purpose | Application Technique | Pro Tip |
|---|---|---|---|---|
| 1 | Volumizing Fibers | Add volume and thickness to sparse brows | Brush through brows in short, upward strokes. | Start with a light layer and build up gradually. |
| 2 | Defining Pencil | Define shape and fill in gaps | Use short, feathery strokes to mimic natural hair growth. | Keep the pencil sharp and use a light hand. |
| 3 | Setting Gel | Lock in the fibers and pencil, prevent smudging | Brush through brows, following the direction of hair growth. | Use a light hand to avoid stiffness. |
4. Why Waterproof? The Importance of Long-Lasting Brow Power (💧)
Imagine spending precious time perfecting your brows, only to have them disappear at the first sign of sweat, rain, or (heaven forbid!) tears. That’s where the waterproof formula comes in!
Benefits of a Waterproof Formula:
- Long-lasting wear: Your brows will stay put all day long, no matter what life throws your way. 💪
- Smudge-proof: No more worrying about accidentally rubbing your brows and ending up with a brow-less smudge on your forehead. 🙅♀️
- Sweat-proof: Perfect for workouts, hot weather, or just generally being a human who sweats. 😅
- Tear-proof: Don’t let a little emotion ruin your perfect brows! Sob away, knowing your brows are still on point. 😭
- Peace of mind: Knowing your brows are locked and loaded allows you to focus on more important things, like conquering the world (or at least getting through your to-do list). 🌍
The Science Behind Waterproofing:
Our waterproof formula contains special polymers that create a protective barrier around the brow hairs, repelling water and preventing smudging. This ensures your brows stay flawless, even in the face of adversity. 🔬
5. Choosing Your Perfect Shade: Finding Your Brow BFF (🎨)
Finding the right shade is crucial for achieving natural-looking brows. Too dark, and you’ll look like you’ve drawn on your brows with a Sharpie. Too light, and they’ll disappear altogether.
Here’s a general guide to choosing your shade:
- Fair Hair: Opt for a shade that’s one or two shades darker than your hair color. Think light brown or taupe. 👩🏼
- Medium Hair: Choose a shade that matches your hair color or is slightly darker. Medium brown or dark brown are good options. 👩🏽
- Dark Hair: Select a shade that’s a shade lighter than your hair color to avoid a harsh look. Dark brown or soft black will work well. 👩🏾
- Red Hair: Go for a shade with warm undertones, such as auburn or reddish-brown. 👩🏻🦰
- Gray Hair: Choose a soft gray or taupe shade to complement your silver strands. 👵🏼
ZenaMakeup’s Shade Range:
We offer a wide range of shades to suit every hair color and complexion. Check out our shade chart online or visit a ZenaMakeup counter to find your perfect match. Our trained beauty consultants are always happy to help!
(Image of a shade chart with descriptions of each shade)
Pro Tip: When in doubt, go slightly lighter rather than darker. You can always build up the color, but it’s much harder to lighten it.
6. Application Tips & Tricks: From Beginner to Brow Boss (🏆)
Now that you understand the product and the shade selection process, let’s dive into some application tips and tricks to help you achieve brow perfection.
- Start with Clean Brows: Make sure your brows are clean and free of any makeup or oil.
- Brush Your Brows Upward: Use a spoolie to brush your brows upward to reveal their natural shape.
- Map Out Your Brows: Use the defining pencil to lightly outline the shape you want to achieve.
- Fill in Sparse Areas: Use the volumizing fibers to fill in any sparse areas, focusing on the inner part of the brow.
- Define the Arch and Tail: Use the defining pencil to define the arch and tail of the brow, creating a lifted and sculpted look.
- Blend, Blend, Blend: Use a spoolie to blend the pencil and fibers, creating a seamless and natural finish.
- Set with Gel: Use the setting gel to lock in the shape and prevent smudging.
- Clean Up Any Mistakes: Use a cotton swab dipped in makeup remover to clean up any mistakes and create a sharp, defined brow.
(Series of images or GIFs demonstrating each step of the application process)
Advanced Techniques:
- Microblading Effect: Use the defining pencil to create tiny, hair-like strokes that mimic the look of microblading.
- Ombre Brow: Use a lighter shade of the defining pencil on the inner part of the brow and a darker shade on the arch and tail to create an ombre effect.
- Highlight the Brow Bone: Apply a small amount of highlighter under the brow bone to create a lifted and illuminated look.
7. Troubleshooting Common Brow Blunders: Avoiding the Pitfalls (🚧)
Even with the best product and techniques, brow blunders can happen. Here are some common mistakes and how to fix them:
- Brows are Too Dark: Use a spoolie to brush through your brows and remove excess product. You can also use a tinted brow gel that’s a shade lighter to soften the look.
- Brows are Too Light: Apply another layer of the volumizing fibers or defining pencil to add more color.
- Brows are Uneven: Use a ruler or stencil to help you create symmetrical brows. Practice makes perfect!
- Brows Look Harsh: Use a spoolie to blend the product and soften the lines. Avoid using heavy-handed strokes with the defining pencil.
- Brows are Smudging: Make sure you’re using the setting gel to lock in the product. Avoid touching your brows throughout the day.
(Table summarizing common brow blunders and their solutions)
| Problem | Solution |
|---|---|
| Brows Too Dark | Brush through brows with a spoolie, use a lighter tinted brow gel. |
| Brows Too Light | Apply another layer of volumizing fibers or defining pencil. |
| Uneven Brows | Use a ruler or stencil, practice creating symmetrical shapes. |
| Harsh Brows | Blend product with a spoolie, avoid heavy-handed strokes. |
| Smudging | Use setting gel, avoid touching brows throughout the day. |
8. The ZenaMakeup Promise: Quality, Cruelty-Free, and Confidence-Boosting (💖)
At ZenaMakeup, we’re committed to providing high-quality, cruelty-free products that empower you to feel confident and beautiful. Our 3-in-1 Waterproof Brow Architect is:
- Cruelty-Free: We never test our products on animals. 🐰
- Paraben-Free: Our formula is free of parabens, which are potentially harmful preservatives.
- Dermatologist-Tested: Our products are tested by dermatologists to ensure they’re safe for sensitive skin.
- Made with High-Quality Ingredients: We use only the finest ingredients to create products that are effective and long-lasting.
We believe that everyone deserves to feel good about themselves, and our products are designed to help you achieve that. With ZenaMakeup, you can create a look that’s uniquely you and feel confident in your own skin.
9. Q&A Session: Ask the Professor Anything! (❓)
Alright, class, that concludes our lecture on the ZenaMakeup 3-in-1 Waterproof Brow Architect! Now it’s your turn. Do you have any burning questions about thin brows, our product, or anything brow-related? Ask away! I’m here to help you become the Brow Boss you were always meant to be!
(Open the floor for questions and answer them thoughtfully and humorously.)
Example Questions & Answers:
- Q: How long will one Brow Architect last?
- A: That depends on how often you use it, but with regular use, it should last you a good 2-3 months! Think of it as a brow investment, not just a purchase!
- Q: Can I use this product if I have oily skin?
- A: Absolutely! The waterproof formula is designed to withstand even the oiliest of skin types. Just make sure to blot your brows with a tissue before applying the product for best results.
- Q: What if I accidentally apply too much product?
- A: Don’t panic! Just use a clean spoolie to brush through your brows and remove the excess product. You can also use a cotton swab dipped in makeup remover to clean up any mistakes.
(End the lecture with a motivational message.)
Congratulations, Brow Graduates! You’ve now completed Brow Boot Camp 101! Go forth and conquer the world, one perfectly defined brow at a time! Remember, with ZenaMakeup’s 3-in-1 Waterproof Brow Architect, you have the power to transform your brows and boost your confidence. Now go out there and rock those brows! ✨
For detailed product specifications and purchases, please go to :https://zenamakeup.com/products/brow-stamp-kit-waterproof-3-in-1-stencil-powder
Leave a Reply