ZenaMakeup Presents: Waterproof Stencil & Powder – Your Guide to Flawless Application (Because Life’s Too Short for Smudged Brows!)
Welcome, makeup mavens and brow-begginers! 👋 I’m your guide, Zara, from ZenaMakeup, and I’m thrilled to introduce you to the magic of our Waterproof Stencil & Powder Kit. Let’s be honest, perfectly shaped brows can be the difference between looking like you conquered the day and looking like the day conquered you. And let’s face it, drawing them on freehand every morning? That’s a recipe for frustration, asymmetry, and potential brow-related existential crises.
That’s where our kit swoops in like a superhero, cape and all! Think of it as your shortcut to consistently stunning brows, rain or shine (literally!).
What’s Inside the ZenaMakeup Waterproof Stencil & Powder Party?
Our kit is designed to be your all-in-one brow solution, whether you’re a seasoned pro or just starting your brow journey. Here’s a peek inside:
- Reusable Stencils (Variety Pack!): We’ve included a range of brow shapes – from the subtly arched to the boldly defined – to suit every face and preference. They’re flexible, durable, and oh-so-easy to clean. Think of them as your brow blueprints! 📐
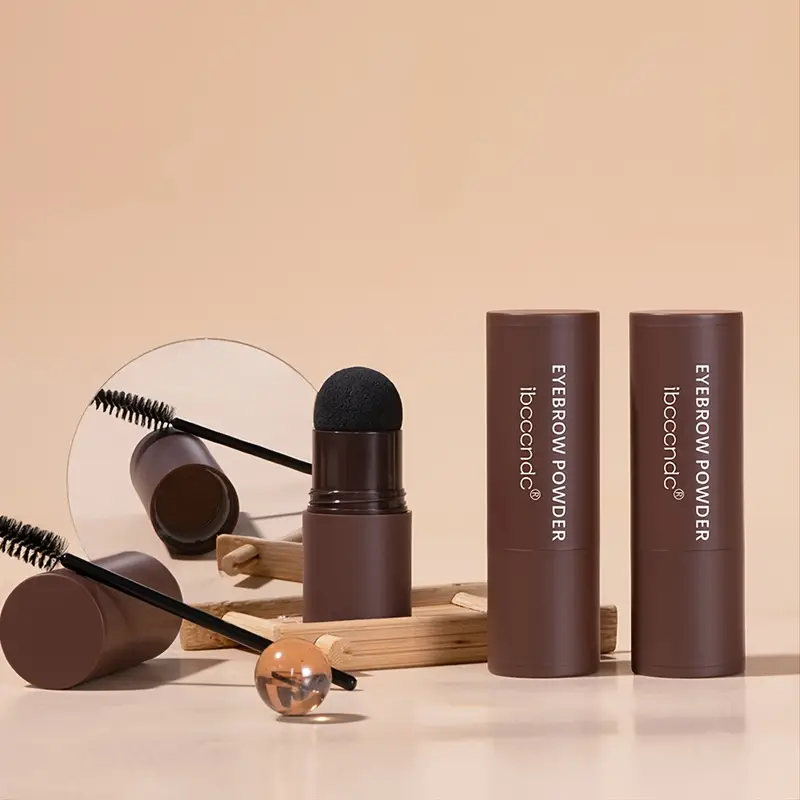
- Waterproof Brow Powder: Our specially formulated powder is pigmented, blendable, and (drumroll, please!) waterproof. Sweat, tears, unexpected downpours? Bring it on! Your brows will stay put, looking fabulous. We offer a variety of shades to match your natural brow color. 🎨
- Double-Ended Applicator Brush: This brush is your trusty sidekick. One end features a spoolie for grooming and blending, while the other end is an angled brush perfect for precise application. It’s like having two brow tools in one! 🖌️
Why ZenaMakeup’s Waterproof Stencil & Powder Kit? (Because We’re Not Just Another Brow Kit!)
Okay, so you’re probably thinking, "Zara, there are tons of brow products out there. Why should I choose yours?" Excellent question! Here’s the ZenaMakeup difference:
- Waterproof That Actually Works: We’re not messing around. Our formula is designed to withstand even the most challenging conditions. No more smudging, fading, or disappearing brows!
- Easy to Use: Even if you’re a complete beginner, you can achieve professional-looking results with our kit. The stencils guide you, and the powder is incredibly forgiving. No artistic skills required!
- Natural-Looking Results: Our powder is finely milled and blends seamlessly into your existing brow hairs, creating a soft, natural finish. No harsh lines or overly dramatic brows here!
- Long-Lasting: Say goodbye to midday brow touch-ups. Our waterproof formula keeps your brows looking perfect all day long.
- Cruelty-Free & Vegan: We believe in beauty without compromise. Our kit is made with cruelty-free ingredients and is 100% vegan. 🐰🌱
- Affordable Glamour: We offer premium quality at a price that won’t break the bank. Because everyone deserves fabulous brows! 💰
The Step-by-Step Guide to Brow Perfection (Prepare for Brow Transformation!)
Alright, let’s get down to business! Here’s your comprehensive guide to using the ZenaMakeup Waterproof Stencil & Powder Kit:
Step 1: Brow Prep – The Foundation for Flawless Brows
Before you even think about picking up a stencil, it’s crucial to prep your brows. This will ensure a smooth, even application and long-lasting results.
- Cleanse: Start with a clean, dry brow area. Remove any makeup, oil, or skincare products with a gentle cleanser or makeup remover. This will allow the powder to adhere properly.
- Groom: Use the spoolie end of your applicator brush to brush your brow hairs upwards and outwards. This will help you see the natural shape of your brows and identify any sparse areas. Trim any excessively long hairs with small brow scissors. (Be careful! We don’t want any brow casualties!)
Step 2: Stencil Selection – Finding Your Brow Soulmate
Choosing the right stencil is key to achieving your desired brow look.
- Experiment: Hold different stencils up to your brow to see which shape best complements your face. Consider your face shape, natural brow arch, and personal preference.
- Placement: Align the stencil with your natural brow, ensuring that the start of the stencil lines up with the inner corner of your eye and the arch aligns with the outer third of your brow. A good way to check this is to hold a brush or pencil vertically against the side of your nose and see where it intersects your brow. The point of intersection should be the inner edge of the brow. Also, angle the brush/pencil so that it runs from the side of your nose to the outer corner of your eye. This is where the outer edge of your eyebrow should end.
- Secure: Once you’ve found the perfect placement, hold the stencil firmly in place with one hand. You can also use a small piece of tape to secure the stencil for extra stability. (Especially helpful if you’re a beginner or prone to shaky hands!)
Step 3: Powder Application – Painting Your Brow Masterpiece
Now for the fun part! It’s time to fill in your brows with our waterproof powder.
- Dip: Dip the angled brush into the brow powder, tapping off any excess. You want to start with a small amount of product and build up the color gradually.
- Apply: Using light, feathery strokes, fill in the stencil, focusing on any sparse areas. Start from the arch and work your way towards the tail of the brow, then fill in the front.
- Blend: Once you’ve filled in the stencil, gently blend the powder with the spoolie to soften any harsh lines and create a more natural look. Pay attention to the inner corners of your brows, blending them upwards and outwards for a seamless transition.
Step 4: Repeat on the Other Brow – Achieving Brow Symmetry
Now, repeat steps 2 and 3 on your other brow. This is where things can get tricky!
- Mirror, Mirror: Use a mirror to compare your brows and ensure they are symmetrical. Don’t be afraid to adjust the placement of the stencil or the amount of powder you use to achieve balance.
- Practice Makes Perfect: Creating symmetrical brows takes practice. Don’t get discouraged if your brows aren’t perfect the first time. Keep practicing, and you’ll get the hang of it!
Step 5: The Finishing Touches – Polishing Your Brow Perfection
Once you’re happy with the shape and color of your brows, it’s time to add the finishing touches.
- Clean Up: Use a cotton swab dipped in makeup remover to clean up any stray powder or smudges around your brows. This will create a clean, crisp line and define your brow shape.
- Highlight: Apply a small amount of highlighter to your brow bone to enhance your arch and make your brows pop.
- Set (Optional): For extra long-lasting results, you can set your brows with a clear brow gel. This will help keep your brow hairs in place and prevent any smudging.
Troubleshooting Tips & Tricks (Because We’ve All Been There!)
Even with the best products and instructions, things can sometimes go awry. Here are some common brow blunders and how to fix them:
| Problem | Solution |
|---|---|
| Brows Too Dark | Use a clean spoolie to brush through your brows and remove excess powder. You can also use a cotton swab dipped in makeup remover to lighten the color. Next time, use a lighter hand when applying the powder. |
| Brows Too Light | Apply another layer of powder, focusing on the sparse areas. You can also use a slightly darker shade of powder to add more definition. |
| Brows Uneven | Compare your brows in the mirror and adjust the shape and color as needed. Use a cotton swab dipped in makeup remover to clean up any mistakes and create a more symmetrical look. |
| Stencil Doesn’t Fit My Brows | Try a different stencil shape or adjust the placement of the stencil. You can also use multiple stencils to create a custom brow shape. |
| Powder Smudges Easily | Make sure your skin is clean and dry before applying the powder. Use a light hand when applying the powder and blend it well. Set your brows with a clear brow gel for extra hold. |
| Waterproof Formula Still Smudges/Fades | Ensure you’re using a makeup remover designed for waterproof makeup. Also, avoid excessive rubbing or touching your brows throughout the day. |
Choosing the Right Shade: A Guide to Brow Harmony
Selecting the correct shade of brow powder is crucial for achieving natural-looking results. Here’s a general guideline:
| Hair Color | Recommended Brow Powder Shade |
|---|---|
| Blonde | Light Brown, Taupe |
| Light Brown | Medium Brown, Taupe |
| Medium Brown | Medium Brown, Dark Brown |
| Dark Brown | Dark Brown, Espresso |
| Black | Espresso, Black (use sparingly and blend thoroughly!) |
| Red/Auburn | Auburn, Warm Brown |
| Gray/White | Light Brown, Gray (specifically formulated for gray hair) |
Pro Tip: When in doubt, choose a shade that’s slightly lighter than your hair color. It’s easier to build up the color than to lighten it.
Caring for Your Stencils: Keeping Them Clean and Ready for Action
To ensure your stencils last, it’s important to clean them after each use.
- Wash with Soap and Water: Gently wash the stencils with warm water and mild soap.
- Dry Thoroughly: Pat the stencils dry with a clean towel or let them air dry completely before storing them.
- Store Properly: Store your stencils in a clean, dry place to prevent them from warping or damage.
Beyond the Basics: Advanced Brow Techniques
Once you’ve mastered the basics, you can explore more advanced brow techniques.
- Ombré Brows: Create a gradient effect by using a lighter shade of powder at the inner corner of your brow and a darker shade at the arch and tail.
- Microblading Simulation: Use the angled brush to create tiny, hair-like strokes within the stencil for a more realistic look.
- Custom Brow Shapes: Combine multiple stencils or trim the edges of a stencil to create a custom brow shape that perfectly suits your face.
ZenaMakeup’s Commitment to Your Brow Journey
We’re not just selling you a product; we’re investing in your brow confidence! We’re committed to providing you with the tools and knowledge you need to achieve your dream brows.
- Customer Support: Our customer support team is always here to answer your questions and provide assistance.
- Online Tutorials: We offer a variety of online tutorials and videos to help you master the art of brow shaping.
- Community Forum: Join our online community forum to connect with other brow enthusiasts, share tips and tricks, and get inspired.
Final Thoughts: Embrace Your Brow Power!
Your brows are a powerful tool. They frame your face, express your emotions, and enhance your overall appearance. With ZenaMakeup’s Waterproof Stencil & Powder Kit, you can unlock your brow potential and achieve consistently stunning results, no matter what life throws your way.
So go ahead, embrace your brow power! Experiment with different shapes and styles, and discover the perfect brows for you. And remember, we’re here to support you every step of the way.
Happy Brow-ing! 🎉
For detailed product specifications and purchases, please go to :https://zenamakeup.com/products/brow-stamp-kit-waterproof-3-in-1-stencil-powder
Leave a Reply