Lecture: Brow Boss Academy – Mastering the Art of Defined Brow Edges with ZenaMakeup’s Waterproof Stencil & Powder! 🎓✨
Hello, Brow Bosses-in-training! 👋 I’m your Head Brow Strategist at ZenaMakeup, and welcome to Brow Boss Academy! Today, we’re diving deep into the wonderful world of defined brow edges, a technique that can elevate your entire makeup game from "meh" to "magnificent"! 🤩
Forget those days of asymmetrical brow battles and fuzzy, undefined arches. We’re talking razor-sharp precision, long-lasting definition, and brows so good, they deserve their own Instagram account! 🤳
At ZenaMakeup, we understand the struggle. We’ve seen the brow mishaps, the uneven fills, and the frantic attempts to salvage a brow gone rogue. That’s why we developed the ZenaMakeup Waterproof Stencil & Powder Kit – your secret weapon to achieving brow perfection every. single. time. ⚔️
Think of this lecture as your personal brow bootcamp. We’ll cover everything from brow anatomy to stencil selection, powder application, and even troubleshooting common brow blunders. So, grab your coffee ☕, your brow tools, and let’s get started!
I. Brow Basics 101: Understanding the Architecture of Awesome 🏛️
Before we jump into stencils and powders, let’s lay the foundation with a little brow anatomy. Knowing the key components of your brow will help you understand how to best shape and define them.
- The Head (Inner Corner): This is the starting point of your brow, closest to your nose. It should align with the inner corner of your eye or slightly inward for a more flattering look.
- The Arch: This is the highest point of your brow, adding lift and definition to your face. It should typically fall about two-thirds of the way from the inner corner.
- The Tail (Outer Corner): This is the end of your brow, tapering towards your temple. It should end slightly above the beginning of your brow for a lifted and youthful appearance.
Why are defined edges so important? 🤔
Defined brow edges create a polished and sophisticated look. They:
- Frame your face: Like a perfect picture frame, defined brows draw attention to your eyes and enhance your overall features.
- Add structure and lift: Clean lines and sharp edges can visually lift your eyes and cheekbones, making you look more awake and youthful.
- Provide a base for other makeup: Well-defined brows act as a guide for other makeup applications, ensuring a harmonious and balanced look.
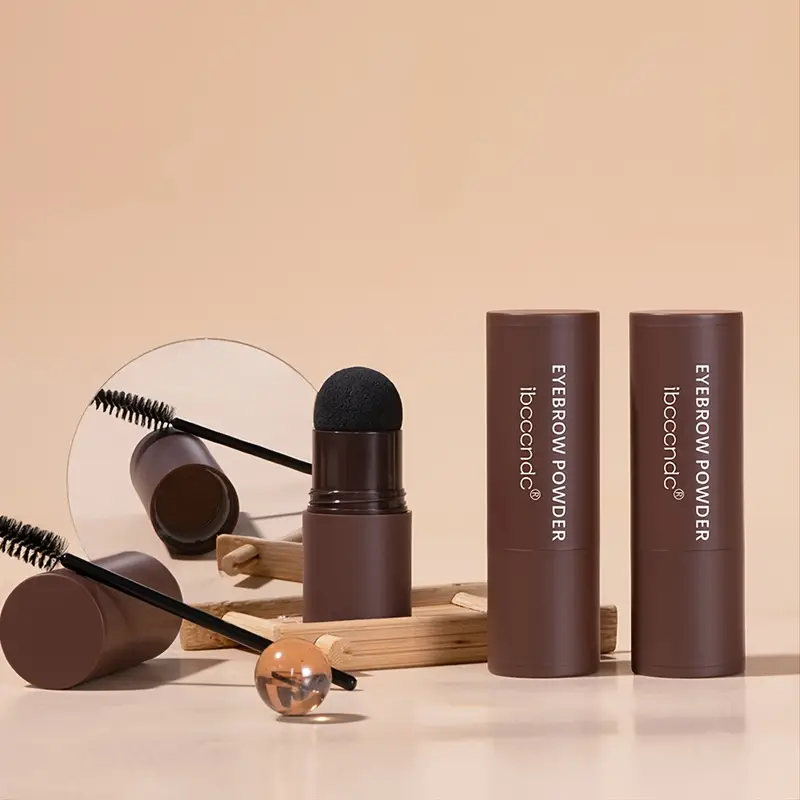
II. Introducing the ZenaMakeup Waterproof Stencil & Powder Kit: Your Brow Dream Team! 🦸♀️🦸♂️
Okay, let’s talk about the stars of the show! Our ZenaMakeup Waterproof Stencil & Powder Kit is designed to be user-friendly, long-lasting, and suitable for all brow types.
Here’s what’s included:
| Item | Description | Benefits |
|---|---|---|
| Waterproof Stencils | A collection of reusable stencils in various shapes and sizes. Made from flexible, durable, and waterproof material. | Provides a foolproof guide for creating perfectly shaped and symmetrical brows. Waterproof material ensures clean application and easy cleaning. Variety of shapes caters to different face shapes and brow preferences. |
| Brow Powder | Finely milled, highly pigmented brow powder in a range of natural shades. Formulated to be waterproof and smudge-proof, providing long-lasting definition. | Delivers natural-looking color and fills in sparse areas. Waterproof formula ensures all-day wear without fading or smudging. Buildable formula allows for customized intensity, from soft and subtle to bold and dramatic. |
| Angled Brow Brush | A high-quality angled brush with firm bristles, designed for precise application of brow powder. | Allows for controlled and precise application of brow powder, creating defined edges and natural-looking hair strokes. Firm bristles help to distribute the powder evenly and prevent clumping. |
| Spoolie Brush | A spoolie brush for blending and grooming brow hairs. | Blends the powder seamlessly into the brows for a natural finish. Helps to groom brow hairs and soften harsh lines. |
Why is our kit superior? 🥇
- Waterproof Formula: Our powder and stencils are designed to withstand sweat, tears, and even a dip in the pool! 🏊♀️ No more worrying about your brows disappearing mid-day.
- Variety of Stencil Shapes: We offer a range of stencil shapes to suit different face shapes and brow preferences. From soft arches to bold angles, we’ve got you covered.
- High-Quality Pigment: Our brow powder is highly pigmented, delivering intense color payoff with just a small amount. This means your kit will last you a long time!
- User-Friendly Design: Whether you’re a brow newbie or a seasoned pro, our kit is easy to use and provides foolproof results.
III. Choosing Your Stencil: Finding Your Brow Soulmate! 💘
Selecting the right stencil shape is crucial for achieving brows that complement your face shape. Here’s a quick guide:
| Face Shape | Recommended Stencil Shape | Why? |
|---|---|---|
| Oval | You’re lucky! Most brow shapes work well with oval faces. Experiment with slightly angled or softly rounded arches. | Balanced features mean you can get away with almost anything! |
| Round | High arches with a defined peak help to create the illusion of length and definition. Avoid flat or overly rounded brows. | High arches add angles and definition to soften round features. |
| Square | Softer, rounded arches help to soften the strong angles of a square face. Avoid overly angular or harsh brows. | Soft arches create a more feminine and balanced look. |
| Heart | Softer, rounded arches with a gentle curve are ideal. Avoid overly dramatic or angled brows. | Soft arches balance the wider forehead and pointed chin. |
| Long | Flat or slightly angled brows help to shorten the appearance of a long face. Avoid high arches. | Flat brows create a horizontal line, visually shortening the face. |
| Diamond | Slightly curved or angled brows with a defined arch. Avoid overly thin or straight brows. | Defines the features and balances the wider cheekbones. |
Pro Tip: Don’t be afraid to experiment! Try different stencil shapes until you find one that you love and that complements your unique features. You can even mix and match stencils to create a custom brow shape! 🎨
IV. The Application Process: Brow Perfection, Step-by-Step! 📝
IV. The Application Process: Brow Perfection, Step-by-Step! 📝
Alright, Brow Bosses, let’s get down to business! Here’s a step-by-step guide to using the ZenaMakeup Waterproof Stencil & Powder Kit like a pro:
- Prep Your Brows: Start with clean, dry brows. Use a spoolie brush to groom your brow hairs in the direction you want them to grow.
- Choose Your Stencil: Select the stencil shape that best suits your face and brow preferences.
- Position the Stencil: Align the stencil with your natural brow line. Make sure the stencil is positioned correctly, with the head (inner corner) aligned with the inner corner of your eye or slightly inward.
- Secure the Stencil: Hold the stencil firmly in place with one hand. You can also use a small piece of tape to secure the stencil for extra stability.
- Apply the Brow Powder: Using the angled brow brush, gently tap it into the brow powder. Remove any excess powder by tapping the brush on the edge of the container.
- Fill in the Stencil: Use short, light strokes to fill in the stencil with the brow powder. Start from the arch and work your way towards the tail, then fill in the head.
- Remove the Stencil: Carefully remove the stencil, pulling it away from your face.
- Blend and Groom: Use the spoolie brush to blend the powder seamlessly into your brows and soften any harsh lines.
- Repeat on the Other Brow: Repeat steps 3-8 on the other brow, making sure to align the stencil correctly for symmetrical results.
- Clean Up (Optional): If desired, use a concealer brush and a small amount of concealer to clean up any stray powder or create a more defined edge.
- Admire Your Work! Take a step back and admire your perfectly defined brows! ✨
V. Troubleshooting Brow Blunders: Solving Common Issues! 🛠️
Even with the best tools and techniques, brow mishaps can happen. Here are some common issues and how to fix them:
| Problem | Solution |
|---|---|
| Uneven Brows | Check Stencil Placement: Ensure both stencils are aligned correctly and at the same angle. Use a ruler or brow measuring tool to help. Adjust Powder Application: Apply more powder to the thinner brow or less to the thicker brow to create a more balanced look. * Clean Up with Concealer: Use concealer to even out the edges and create a more symmetrical shape. |
| Brows Too Dark | Use a Lighter Shade: Choose a brow powder that is one or two shades lighter than your natural brow color. Apply Less Powder: Use a light hand when applying the powder and build up the color gradually. * Blend, Blend, Blend: Use the spoolie brush to blend the powder thoroughly and soften the color. |
| Brows Too Light | Use a Darker Shade: Choose a brow powder that is closer to your natural brow color. Apply More Powder: Build up the color gradually until you achieve the desired intensity. * Use a Brow Pencil: Use a brow pencil to fill in sparse areas and add definition. |
| Harsh Lines | Blend, Blend, Blend: Use the spoolie brush to blend the powder thoroughly and soften any harsh lines. Use a Softer Brush: Use a softer, fluffier brush to apply the powder for a more natural finish. * Avoid Over-Defining the Edges: Focus on filling in the brows and creating a natural shape, rather than creating overly defined edges. |
| Powder Smudging/Fading | Use a Waterproof Formula: The ZenaMakeup Waterproof Brow Powder is designed to resist smudging and fading. Set with Brow Gel: Use a clear or tinted brow gel to set the powder and keep your brows in place all day. * Avoid Touching Your Brows: Avoid touching your brows throughout the day to prevent smudging. |
| Stencil Doesn’t Fit My Brow Shape | Try a Different Stencil: Experiment with different stencil shapes until you find one that fits your natural brow shape. Customize the Stencil: Use scissors to trim the stencil to better fit your brow shape. * Use the Stencil as a Guide: Use the stencil as a guide to create the overall shape, but fill in the brows freehand for a more customized look. |
VI. Level Up Your Brow Game: Advanced Techniques! 🚀
Once you’ve mastered the basics, you can start experimenting with advanced techniques to take your brow game to the next level:
- Ombre Brows: Create a gradient effect by using a lighter shade of brow powder on the inner corner of your brow and a darker shade on the arch and tail.
- Hair-Like Strokes: Use a fine-tipped brow pencil or an angled brush and brow powder to create individual hair-like strokes for a more natural and textured look.
- Highlighting the Brow Bone: Apply a shimmery highlighter to your brow bone to enhance the arch and create a more lifted appearance.
- Brow Lamination Effect: Use a strong-hold brow gel to brush your brow hairs upwards and outwards, creating a laminated effect that lasts all day.
VII. Caring for Your Brows & Stencils: Keeping Things Tip-Top! 🧼
Just like your skin, your brows need TLC!
- Don’t Over-Pluck: Over-plucking can damage your hair follicles and prevent your brows from growing back. Be gentle and only remove stray hairs.
- Moisturize Your Brows: Use a brow serum or castor oil to keep your brow hairs healthy and hydrated.
- Clean Your Stencils: After each use, clean your stencils with soap and water to remove any powder buildup. This will prevent the stencils from becoming sticky and ensure clean application in the future.
- Store Your Kit Properly: Store your ZenaMakeup Waterproof Stencil & Powder Kit in a cool, dry place away from direct sunlight.
VIII. Conclusion: You’re Officially a Brow Boss! 🎉
Congratulations, Brow Bosses! You’ve officially completed Brow Boss Academy! You now have the knowledge and tools to create perfectly defined, waterproof brows that will last all day long.
Remember, practice makes perfect! Don’t be discouraged if your brows aren’t perfect on the first try. Keep experimenting with different stencil shapes, powder shades, and techniques until you find what works best for you.
With the ZenaMakeup Waterproof Stencil & Powder Kit, you’ll be rocking flawless brows in no time!
Now go forth and conquer the world, one perfectly defined brow at a time! 🌍👑
We at ZenaMakeup are so excited to see your brow transformations! Don’t forget to tag us in your photos using #ZenaMakeupBrowBoss! 💖
Bonus Tip: For even more brow inspiration and tutorials, follow us on social media! You can find us on Instagram, Facebook, and YouTube. We’re always sharing new tips, tricks, and product updates. Stay tuned! 📣
For detailed product specifications and purchases, please go to :https://zenamakeup.com/products/brow-stamp-kit-waterproof-3-in-1-stencil-powder
Leave a Reply