ZenaMakeup Presents: Waterproof Stencil & Powder – Your Beginner’s Guide to Brow-tastic Perfection! 眉毛万岁! 🎉
Hello, Gorgeous! 👋 It’s your friendly neighborhood Product Manager, here to guide you through the wonderful world of eyebrows… and how to conquer them like a seasoned pro, even if you’re currently rocking the "barely-there" or the "permanently surprised" look. 😱
Let’s face it, eyebrows are the unsung heroes of our faces. They frame our eyes, express our emotions (or lack thereof after a long day!), and can make or break a makeup look. But achieving symmetrical, perfectly shaped brows can feel like navigating a minefield… blindfolded. 🙈
That’s why we at ZenaMakeup have created the Waterproof Stencil & Powder Kit – your secret weapon in the fight for flawless brows! Think of it as your eyebrow GPS, guiding you to brow perfection, no matter your skill level. 🗺️
Today’s Lecture: Brow Bootcamp for Beginners (and Beyond!)
We’re going to cover everything you need to know about this revolutionary kit, from understanding eyebrow shapes to mastering the stencil application, and finally, achieving that coveted natural-looking filled-in effect. Consider this your comprehensive guide to brow brilliance. 🎓
Here’s the Agenda:
- Part 1: Why Eyebrows Matter (A Hilarious History Lesson & Anatomy 101)
- Part 2: Introducing the ZenaMakeup Waterproof Stencil & Powder Kit – Your New Best Friend!
- Part 3: Stencil Selection: Finding Your Brow Match Made in Heaven (Shape Guide Included!)
- Part 4: Application Techniques: From Zero to Brow Hero in Minutes! (Step-by-Step Guide with Tips & Tricks)
- Part 5: Troubleshooting Brow Blunders: Fixing Common Mistakes & Achieving Brow Harmony
- Part 6: Beyond the Basics: Advanced Techniques & Product Recommendations
- Part 7: Q&A – Your Burning Brow Questions Answered!
So, grab your coffee ☕, settle in, and let’s get this brow party started! 🥳
Part 1: Why Eyebrows Matter (A Hilarious History Lesson & Anatomy 101)
Before we dive into the nitty-gritty of stencil application, let’s appreciate the power of the brow.
- A (Very) Brief History of Eyebrow Obsession: From ancient Egypt where meticulously shaped and darkened brows symbolized status and protection (think Cleopatra’s bold look!), to the roaring ’20s with their thin, dramatic arches, eyebrows have always been a statement. Remember the over-plucked brows of the 90s? 😬 Let’s just say, we’ve learned a lot since then.
- The Anatomy of an Eyebrow:
- Head: The innermost part of the brow, closest to your nose. Should be slightly fuller than the tail.
- Arch: The highest point of your brow. This defines the shape and adds lift to your face.
- Tail: The outer part of the brow, tapering towards your temple. It should end slightly above the head.
- Why Eyebrows are So Important:
- Facial Framing: Think of your eyebrows as the picture frame for your eyes. They enhance your features and create balance.
- Emotional Expression: Eyebrows are key communicators of emotion. Raised brows indicate surprise, furrowed brows show anger or concentration, and perfectly shaped brows… well, they just look good! 😉
- Youthful Appearance: Fuller, well-defined brows can make you look younger and more awake. Say goodbye to tired eyes! 😴➡️🤩
Key Takeaway: Eyebrows are not just random hairs above your eyes. They are powerful tools that can transform your look.
Part 2: Introducing the ZenaMakeup Waterproof Stencil & Powder Kit – Your New Best Friend!
Okay, enough history and anatomy. Let’s talk about the star of the show! 🌟
The ZenaMakeup Waterproof Stencil & Powder Kit is designed to take the guesswork out of eyebrow shaping. It’s perfect for beginners who are intimidated by freehand drawing or those who simply want to achieve consistent, symmetrical brows every time.
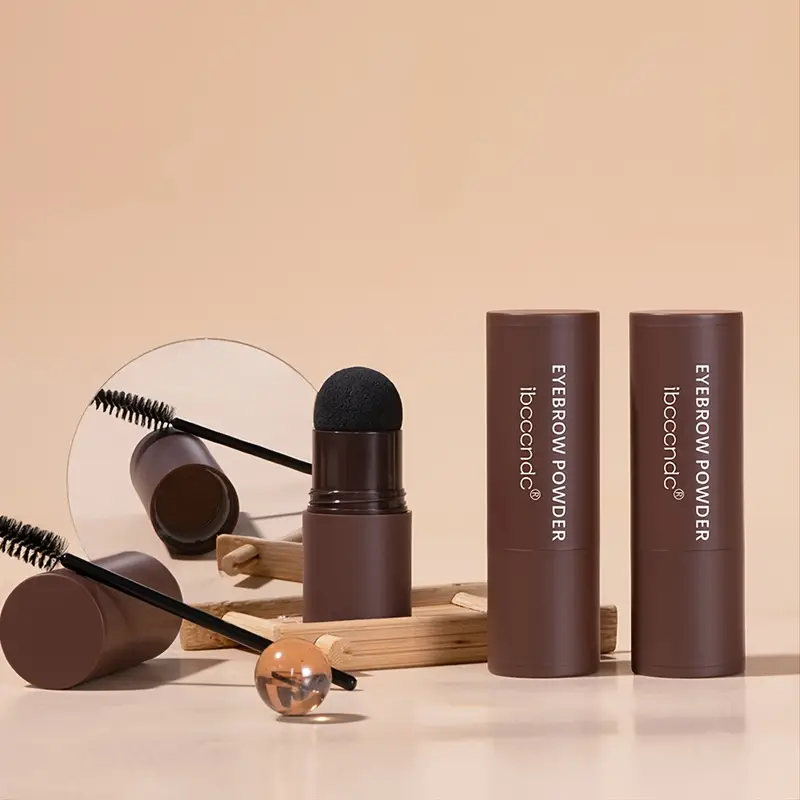
What’s Included:
| Item | Description | Benefit |
|---|---|---|
| Reusable Stencils (6-12 styles, depending on the Kit) | Flexible, durable stencils in a variety of shapes to suit different face shapes and brow preferences. | Provides a foolproof guide for creating perfectly shaped brows. Ensures symmetry and consistency. |
| Waterproof Brow Powder | Finely milled, highly pigmented powder that adheres to the skin and brow hairs for long-lasting wear. | Creates a natural-looking filled-in effect. Waterproof formula ensures brows stay put all day, even through sweat, rain, or tears (of joy, of course!). 💪 |
| Double-Ended Applicator Brush | Angled brush for precise powder application and a spoolie brush for blending and grooming. | Allows for controlled application and seamless blending. The spoolie brush helps to soften harsh lines and create a natural finish. |
| Instruction Manual | Detailed step-by-step instructions with helpful tips and tricks. | Guides you through the entire process, from stencil selection to application techniques. Ensures a successful outcome, even for beginners. |
Why You’ll Love It:
- Beginner-Friendly: No artistic skills required! The stencils do all the work.
- Saves Time: Achieve perfect brows in minutes, even on busy mornings. ⏰
- Waterproof & Long-Lasting: Your brows will stay flawless all day long.
- Variety of Shapes: Find the perfect stencil to complement your face shape.
- Natural-Looking Results: The finely milled powder blends seamlessly for a soft, natural finish.
- Reusable & Economical: The stencils can be used over and over again.
Key Takeaway: The ZenaMakeup Waterproof Stencil & Powder Kit is your all-in-one solution for achieving perfect brows, no matter your skill level.
Part 3: Stencil Selection: Finding Your Brow Match Made in Heaven (Shape Guide Included!)
Choosing the right stencil is crucial for achieving a flattering brow shape. Don’t just grab the first one you see! 🙅♀️ Consider your face shape and natural brow shape when making your selection.
Face Shape & Brow Shape Guide:
| Face Shape | Recommended Brow Shape | Stencil Style Suggestion (From ZenaMakeup Kit) |
|---|---|---|
| Oval | Almost any brow shape works well with an oval face. You have the most flexibility! A soft, angled brow with a gentle arch is a classic choice. | Stencil Styles: "Classic Arch," "Soft Angle," "Natural Curve" |
| Round | A high-arched brow creates the illusion of length and definition. Avoid flat or straight brows, as they can make your face appear wider. | Stencil Styles: "High Arch," "Dramatic Angle" |
| Square | Softer, rounded brows help to soften the strong angles of a square face. Avoid sharp, angular brows, as they can accentuate the squareness. | Stencil Styles: "Rounded Arch," "Soft Curve" |
| Heart | A soft, rounded brow with a gentle arch balances the wider forehead and narrower chin. Avoid overly dramatic or straight brows. | Stencil Styles: "Soft Arch," "Rounded Curve," "Natural Angle" |
| Long/Oblong | Flat, straight brows can make a long face appear shorter. Avoid high arches, as they can elongate the face. | Stencil Styles: "Straight Brow," "Slightly Angled" |
| Diamond | Slightly curved or angled brows help to soften the widest part of the face (cheekbones). Avoid overly dramatic or straight brows. | Stencil Styles: "Soft Angle," "Curved Arch" |
Tips for Choosing the Right Stencil:
- Start with your natural brow shape: Choose a stencil that is closest to your natural brow shape. You want to enhance your brows, not completely change them.
- Consider your personal style: Do you prefer a bold, dramatic brow or a softer, more natural look?
- Experiment! Try different stencils to see what looks best on your face. The ZenaMakeup kit offers a variety of shapes, so you’re sure to find the perfect match.
- Don’t be afraid to trim: If the stencil is slightly too long, you can trim it with scissors to fit your brow length.
Key Takeaway: Choosing the right stencil is essential for achieving a flattering brow shape. Consider your face shape, natural brow shape, and personal style when making your selection.
Part 4: Application Techniques: From Zero to Brow Hero in Minutes! (Step-by-Step Guide with Tips & Tricks)
Alright, you’ve got your kit, you’ve chosen your stencil… let’s get to the fun part! 🎉 Follow these simple steps to achieve brow perfection in minutes.
Step-by-Step Guide:
- Prep Your Brows: Cleanse your brows to remove any oil or makeup. Brush your brow hairs upwards with the spoolie brush to groom them.
- Position the Stencil: Align the stencil with your natural brow. Make sure the inner edge of the stencil lines up with the inner corner of your eye. Hold the stencil firmly in place with one hand.
- Pro Tip: Use a mirror with magnification to ensure precise placement.
- Apply the Powder: Using the angled brush, gently dab the brow powder onto the stencil, filling in the empty space. Start with a small amount of powder and build up the color gradually.
- Pro Tip: Tap off any excess powder from the brush before applying to avoid a heavy, unnatural look.
- Remove the Stencil: Carefully remove the stencil, holding it in place to prevent smudging.
- Blend & Groom: Use the spoolie brush to blend the powder and soften any harsh lines. Brush your brow hairs upwards and outwards to create a natural, feathered effect.
- Repeat on the Other Brow: Repeat steps 2-5 on the other brow.
- Clean Up (Optional): Use a cotton swab dipped in makeup remover to clean up any stray powder or correct any minor imperfections.
- Pro Tip: You can also use a concealer brush to define the edges of your brows for a more polished look.
Visual Aid (Imagine this as a series of photos or GIFs):
- [Image/GIF: Clean Brows Brushed Up]
- [Image/GIF: Stencil Aligned on Brow]
- [Image/GIF: Powder Applied to Stencil]
- [Image/GIF: Stencil Removed]
- [Image/GIF: Blending with Spoolie]
- [Image/GIF: Finished Brows – Symmetrical & Beautiful!]
Tips & Tricks for Perfect Application:
- Start Light: It’s always easier to add more powder than to remove too much.
- Use Light, Feather-Like Strokes: Avoid pressing too hard with the brush, as this can create harsh lines.
- Focus on the Arch: The arch is the highest point of your brow and defines its shape. Make sure to fill in the arch properly.
- Don’t Forget the Tail: The tail should taper towards your temple, but it shouldn’t be too thin or too short.
- Practice Makes Perfect: Don’t get discouraged if your brows aren’t perfect on the first try. With practice, you’ll become a brow pro in no time!
Key Takeaway: With a little practice and patience, you can achieve perfect brows every time using the ZenaMakeup Waterproof Stencil & Powder Kit. Remember to start light, blend well, and don’t be afraid to experiment.
Part 5: Troubleshooting Brow Blunders: Fixing Common Mistakes & Achieving Brow Harmony
Even with the best tools and techniques, brow blunders can happen. Don’t panic! Here are some common mistakes and how to fix them:
| Mistake | Solution |
|---|---|
| Brows are too dark | Use the spoolie brush to blend the powder and soften the color. You can also use a clean tissue to blot any excess powder. |
| Brows are uneven | Use a cotton swab dipped in makeup remover to correct the shape of the brow that is too thick or too long. Then, reapply the powder to match the other brow. |
| Brows look unnatural | Make sure you’re using the right stencil for your face shape and natural brow shape. Blend the powder well and avoid harsh lines. |
| Brows are too far apart/too close together | Pay attention to the placement of the stencil. The inner edge of the stencil should line up with the inner corner of your eye. |
| Brows look too boxy | Use the spoolie brush to soften the inner edges of the brows. Avoid creating a harsh, square shape at the head of the brow. |
| Powder is smudging | Make sure you’re using a waterproof brow powder. Set your brows with a clear brow gel to prevent smudging. |
Brow Harmony Tips:
- Brows should be sisters, not twins: They don’t have to be perfectly identical, but they should be similar in shape and color.
- Consider your hair color: Choose a brow powder that is slightly lighter than your hair color for a more natural look.
- Don’t over-pluck: Over-plucking can damage the hair follicles and prevent your brows from growing back.
- Regularly groom your brows: Keep your brows neat and tidy by trimming any stray hairs with small scissors.
Key Takeaway: Brow blunders happen to everyone. The key is to know how to fix them. With a little practice and patience, you can achieve brow harmony every time.
Part 6: Beyond the Basics: Advanced Techniques & Product Recommendations
Now that you’ve mastered the basics of the ZenaMakeup Waterproof Stencil & Powder Kit, let’s explore some advanced techniques and product recommendations to take your brow game to the next level.
Advanced Techniques:
- Highlighting: Apply a highlighter or shimmer shadow underneath your brow bone to create lift and definition.
- Concealing: Use a concealer brush to define the edges of your brows and create a more polished look.
- Brow Gel: Use a clear or tinted brow gel to set your brows in place and add volume.
- Ombre Brows: Use two different shades of brow powder to create an ombre effect, with the lighter shade at the head of the brow and the darker shade at the tail.
- Microblading Simulation: Use short, feathery strokes with a fine-tipped brow pencil to mimic the look of microblading.
Product Recommendations (from ZenaMakeup, of course!):
- ZenaMakeup Brow Highlighter: A creamy, blendable highlighter that adds lift and definition to your brows.
- ZenaMakeup Precision Concealer Brush: A small, angled brush that allows for precise concealer application.
- ZenaMakeup Brow Setting Gel: A clear, long-lasting brow gel that keeps your brows in place all day.
- ZenaMakeup Brow Pencil (Ultra-Fine Tip): For detailed hair-like strokes and filling in sparse areas.
Key Takeaway: Once you’ve mastered the basics, the possibilities are endless! Experiment with different techniques and products to create a brow look that is uniquely you.
Part 7: Q&A – Your Burning Brow Questions Answered!
Okay, class, it’s time for Q&A! I’ve anticipated some of your burning brow questions, but feel free to add your own in the comments below.
Q: My brows are naturally very sparse. Will this kit work for me?
A: Absolutely! The ZenaMakeup Waterproof Stencil & Powder Kit is designed to fill in sparse brows and create a fuller, more defined look. You may need to use a slightly darker shade of brow powder to achieve the desired coverage. You can also use the stencil to guide you in applying a brow pencil to create individual hair-like strokes.
Q: I have oily skin. Will the waterproof powder stay in place all day?
A: Yes! The ZenaMakeup brow powder is formulated to be waterproof and long-lasting, even on oily skin. However, for extra insurance, we recommend setting your brows with the ZenaMakeup Brow Setting Gel.
Q: How often should I clean my stencils?
A: You should clean your stencils after each use to prevent buildup of powder and bacteria. Simply wash them with soap and water and allow them to air dry.
Q: Can I use this kit if I have microbladed brows?
A: Yes! The ZenaMakeup Waterproof Stencil & Powder Kit is a great way to maintain the shape and color of your microbladed brows. Just be sure to choose a stencil that complements your existing brow shape.
Q: I’m still struggling to get my brows to look symmetrical. What am I doing wrong?
A: Symmetry can be tricky! Make sure you’re using a mirror with magnification and paying close attention to the placement of the stencil. Try applying the powder to one brow at a time, and then comparing them in the mirror before moving on to the other brow. Remember, brows are sisters, not twins!
Key Takeaway: Don’t be afraid to ask questions! We’re here to help you achieve your brow goals.
Conclusion: Brow Down to Perfection!
Congratulations, class! You’ve officially completed Brow Bootcamp! 🎉 You are now armed with the knowledge and tools to conquer your eyebrows and achieve brow-tastic perfection with the ZenaMakeup Waterproof Stencil & Powder Kit.
Remember to practice, experiment, and have fun with it! And don’t forget to share your brow transformations with us on social media using #ZenaMakeupBrows. We can’t wait to see your amazing results!
Now go forth and conquer those brows! You got this! 💪😘
For detailed product specifications and purchases, please go to :https://zenamakeup.com/products/brow-stamp-kit-waterproof-3-in-1-stencil-powder
Leave a Reply