Waterproof Stencil & Powder: Your Ultimate Solution for Quick, Perfect Brows – A ZenaMakeup Masterclass
Alright, beauty enthusiasts! Gather ’round, because today we’re diving deep into the world of eyebrow perfection. And let me tell you, perfecting those arches can feel like navigating a labyrinth blindfolded. But fear not! ZenaMakeup is here to hand you a map, a compass, and maybe even a little bit of magic with our Waterproof Stencil & Powder: Your Ultimate Solution for Quick, Perfect Brows! 🤩
As your dedicated product manager here at ZenaMakeup (and a self-proclaimed brow obsessive!), I’m thrilled to walk you through this game-changing product. Forget spending hours shaping, filling, and praying your brows look symmetrical (we’ve all been there, right? 😅). This system is designed for speed, precision, and long-lasting results, even if you accidentally fall face-first into a pool (hypothetically speaking, of course!).
So, buckle up, grab your favorite beverage (mine’s a double espresso – brow shaping is serious business!), and let’s get started!
Module 1: The Eyebrow Evolution – From Over-Plucked to On-Fleek
Let’s take a quick trip down memory lane. Remember the days of super-thin, over-plucked brows? 😱 We shudder at the thought! Brows have evolved, darling. They’re no longer just an afterthought; they’re the FRAME of your face! They define your features, enhance your eyes, and can even make you look younger (yes, you read that right!).
But finding the perfect brow shape can be a challenge. Here’s a quick overview of some popular brow styles and who they generally suit:
| Brow Style | Description | Best Suited For… | Potential Pitfalls |
|---|---|---|---|
| Arched Brow | A prominent arch, creating a more dramatic and defined look. | Round or oval faces, as it adds height and definition. | Can make a long face appear even longer if the arch is too high. Can look harsh if not done correctly. |
| Straight Brow | A straighter, more horizontal brow shape. | Longer faces, as it visually shortens the face. Also suits those with strong features. | Can make a round face appear wider if not balanced with other makeup techniques. |
| Rounded Brow | A softer, more natural curve. | Angular faces, as it softens the features. | Can lack definition if not properly filled in. |
| Feathered Brow | A natural-looking brow with individual hairs mimicking a feathered appearance. | Most face shapes, as it’s a versatile and natural option. | Requires more upkeep and precise application. |
| Bold & Defined Brow | A thicker, more prominent brow with a defined shape. | Those who want to make a statement. Can be adapted to suit different face shapes depending on the arch and thickness. | Can look too harsh or unnatural if not done correctly. Requires careful blending and shaping. |
| Microbladed Brow | Semi-permanent tattoo technique that creates hair-like strokes for a fuller brow. | Those with sparse or uneven brows who want a long-lasting solution. | Can be expensive and requires finding a skilled technician. Fades over time and requires touch-ups. |
| Laminated Brow | A treatment that straightens and lifts brow hairs for a fuller, fluffier look. | Those with unruly or downward-growing brow hairs. | Can be damaging to the hair if done too frequently or incorrectly. Requires professional application. |
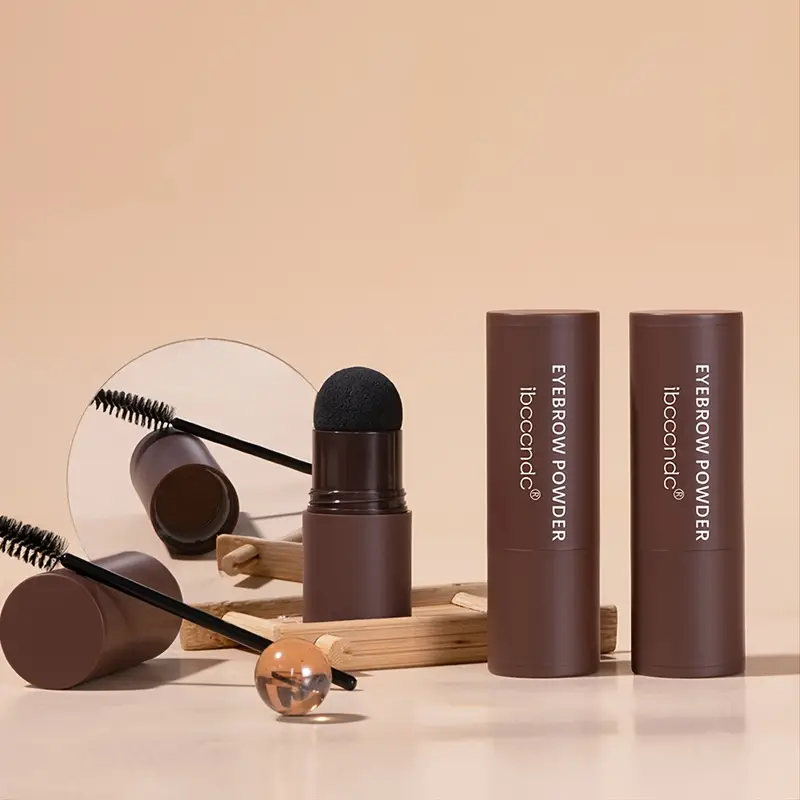
Module 2: Introducing the ZenaMakeup Brow Powerhouse: Stencil & Powder
Okay, now for the main event! Let’s talk about why our Waterproof Stencil & Powder is about to become your new BFF. We’ve taken all the guesswork out of brow shaping and created a system that’s:
- Foolproof: Seriously, even if you’re a complete beginner, you can achieve professional-looking results.
- Fast: Get perfectly shaped brows in minutes! No more agonizing over asymmetry.
- Long-lasting: Our waterproof formula ensures your brows stay put, rain or shine (or pool party! 🥳).
- Versatile: With a variety of stencil shapes and powder shades, you can customize your brows to perfectly suit your face and style.
- Affordable: High-quality brows without breaking the bank!
What’s included in the ZenaMakeup Brow Kit?
- A Selection of Reusable Stencils: Our kit includes multiple stencil shapes designed to complement different face shapes and brow preferences. We’ll delve into choosing the right stencil later.
- Waterproof Brow Powder: A finely milled, highly pigmented powder that adheres effortlessly to the skin and brow hairs for a natural, yet defined look. Available in a range of shades to match your hair color.
- Dual-Ended Applicator Brush: A specially designed brush with an angled tip for precise powder application and a spoolie brush for blending and grooming.
- Carry Case: For Easy Storage
Module 3: The Science of Stencils: Finding Your Perfect Match
The key to the magic lies in the stencils! We’ve designed them to be user-friendly and adaptable to a variety of brow shapes. Here’s how to choose the right stencil for YOU:
- Consider Your Face Shape: Refer back to the table in Module 1. Certain brow shapes naturally complement specific face shapes.
- Analyze Your Natural Brow: Look at the shape of your existing brow. Are they naturally arched, straight, or rounded? Choose a stencil that closely resembles your natural shape for a more seamless look.
- Experiment! Don’t be afraid to try out different stencils to see what you like best. The best way to find your perfect match is to play around with the options.
- Size Matters: Make sure the stencil isn’t too long or too short for your brow. The inner edge of the stencil should align with the inner corner of your eye, and the outer edge should extend slightly beyond the outer corner of your eye.
Pro Tip: If you’re unsure which stencil is right for you, take a selfie and try drawing different brow shapes on the photo using a photo editing app. This can help you visualize which style you prefer.
Module 4: The Art of Powder: Shade Selection and Application
Now that you’ve chosen your stencil, it’s time to unleash the power of the powder! Selecting the right shade is crucial for a natural-looking result.
Choosing Your Shade:
- Rule of Thumb: Generally, you want to choose a shade that’s one or two shades lighter than your natural hair color. This will prevent your brows from looking too harsh or overpowering.
- Consider Undertones: Pay attention to the undertones in your hair. If you have warm-toned hair (golden, reddish), opt for a brow powder with warm undertones. If you have cool-toned hair (ashy, blueish), choose a powder with cool undertones.
- Test it Out: Swatch the powder on your wrist to see how it looks against your skin tone.
- Blend, Blend, Blend! No matter which shade you choose, make sure to blend it thoroughly for a seamless finish.
Applying the Powder Like a Pro:
- Prep Your Brows: Use the spoolie brush to groom your brow hairs in the direction you want them to go. This will create a smooth canvas for the powder.
- Position the Stencil: Hold the stencil firmly against your brow, ensuring it’s aligned correctly.
- Dip & Tap: Dip the angled brush into the brow powder and tap off any excess. This will prevent the powder from clumping or looking too heavy.
- Apply in Short Strokes: Using light, short strokes, fill in the stencil with the brow powder. Start at the arch and work your way outwards, then fill in the inner corner.
- Remove the Stencil: Carefully remove the stencil and admire your perfectly shaped brow!
- Blend, Blend, Blend Again! Use the spoolie brush to blend the powder into your brow hairs and soften any harsh lines. This will create a more natural-looking finish.
- Repeat on the Other Brow: Follow the same steps on your other brow. The key is to be patient and take your time.
- Clean Up (Optional): If you want to further define your brows, you can use a concealer brush to clean up any stray powder around the edges.
Pro Tip: For a more natural look, focus the powder on the sparse areas of your brow. Don’t completely fill in the entire brow, as this can look unnatural. Also, always use a light hand! You can always add more powder, but it’s harder to remove it if you apply too much.
Module 5: Waterproofing Your Way to All-Day Brow Perfection
Okay, so you’ve got perfectly shaped and filled brows. Now, let’s make them last! Our waterproof formula is designed to withstand sweat, humidity, and even the occasional tear (we all have those days! 😢).
Here’s how to maximize the waterproof power of our powder:
- Apply on Clean, Dry Skin: Make sure your brows are clean and dry before applying the powder. Any oils or moisture can prevent the powder from adhering properly.
- Avoid Touching Your Brows: Once you’ve applied the powder, avoid touching your brows too much. This can transfer the powder and cause it to fade.
- Setting Spray (Optional): For extra staying power, you can lightly spritz your brows with a waterproof setting spray.
- Don’t Rub!: If you accidentally get your brows wet, pat them dry gently instead of rubbing. Rubbing can remove the powder.
Pro Tip: For oily skin, consider using a brow primer before applying the powder. This will help to absorb excess oil and create a smoother canvas for the powder to adhere to.
Module 6: Troubleshooting Common Brow Blunders (and How to Avoid Them!)
Even with the best products and techniques, brow blunders can happen. Here are some common mistakes and how to avoid them:
| Problem | Solution |
|---|---|
| Brows are too dark | Use a lighter shade of powder, apply the powder with a lighter hand, and blend thoroughly with a spoolie brush. |
| Brows are too light | Use a darker shade of powder, apply the powder more generously, and consider using a brow pencil or gel to add more definition. |
| Brows are uneven | Double-check the stencil placement, use a ruler to measure the distance between your brows and your hairline, and practice! It takes time to get the hang of it. |
| Brows look too harsh or unnatural | Use a light hand when applying the powder, blend thoroughly with a spoolie brush, and avoid creating sharp, defined lines. Opt for a softer, more natural shape. |
| Powder fades or smudges throughout the day | Make sure your brows are clean and dry before applying the powder, avoid touching your brows, and use a waterproof setting spray. |
| Stencil doesn’t fit my brow | Try different stencils until you find one that closely matches your natural brow shape. You can also trim the stencil to customize it to your brows. |
Module 7: Beyond the Basics: Advanced Brow Techniques
Once you’ve mastered the basics, you can start experimenting with advanced brow techniques to take your brow game to the next level.
- Ombre Brows: Create a gradient effect by using a lighter shade of powder on the inner corner of your brow and a darker shade on the arch and tail.
- Highlighting Your Brow Bone: Apply a highlighter or shimmer eyeshadow just below your brow bone to accentuate your arch and create a lifted look.
- Using Brow Gel: After applying the powder, use a clear or tinted brow gel to set your brows in place and add extra definition.
- Mixing Powders: Don’t be afraid to mix different shades of powder to create a custom color that perfectly matches your hair.
Module 8: ZenaMakeup’s Commitment to Brow Perfection (and You!)
At ZenaMakeup, we’re passionate about helping you achieve your brow goals. Our Waterproof Stencil & Powder is just one of the many ways we’re committed to providing you with high-quality, affordable, and easy-to-use products.
We’re constantly innovating and developing new products to help you look and feel your best. So, stay tuned for more exciting brow innovations from ZenaMakeup!
Final Thoughts:
Perfect brows are within your reach! With a little practice and the right tools (like our amazing Waterproof Stencil & Powder 😉), you can achieve flawless, long-lasting brows that will enhance your features and boost your confidence.
So go forth, my brow-loving friends, and conquer the world, one perfectly shaped arch at a time! 💖
And remember, if you ever have any questions or need any help, don’t hesitate to reach out to our customer support team. We’re always here to help you on your brow journey! Happy brow-ing! 🥳
For detailed product specifications and purchases, please go to :https://zenamakeup.com/products/brow-stamp-kit-waterproof-3-in-1-stencil-powder
Leave a Reply