Your Eyeliner Holy Grail: Get Intense Color and Unmatched Precision with this Long-wear Gel Eyeliner Pen – A Lecture on Liner Nirvana
Welcome, aspiring eyeliner artists! Settle in, grab your coffee (or wine, no judgment here 😉), and prepare to embark on a journey to… eyeliner enlightenment! Today, we’re ditching the shaky lines, the smudged messes, and the general eyeliner frustration. We’re here to discuss the Eyeliner Holy Grail: the Long-wear Gel Eyeliner Pen.
Think of me as your eyeliner guru, ready to guide you through the labyrinth of liquid, pencil, and gel, leading you to the promised land of perfectly defined eyes. Prepare to unlock the secrets to achieving intense color, unmatched precision, and all-day wear – all thanks to this magical pen.
Why this Lecture? Why Now?
Let’s face it, eyeliner is a battlefield. We’ve all been there: staring into the mirror, armed with our chosen weapon, only to emerge looking like a raccoon after a particularly rough night. We’ve endured the dreaded wing asymmetry, the transfer to our upper lid (hello, panda eyes!), and the general feeling of eyeliner inadequacy.
But fear not, my friends! This lecture is your arsenal against those eyeliner woes. We’re going to dissect the long-wear gel eyeliner pen, understand its strengths, learn its techniques, and, ultimately, conquer the eyeliner game!
Lecture Outline:
I. The Eyeliner Hall of Fame (and Shame): A Brief History of Eye Definition
II. Why Gel Eyeliner Pens Reign Supreme: Understanding the Formulation & Delivery System
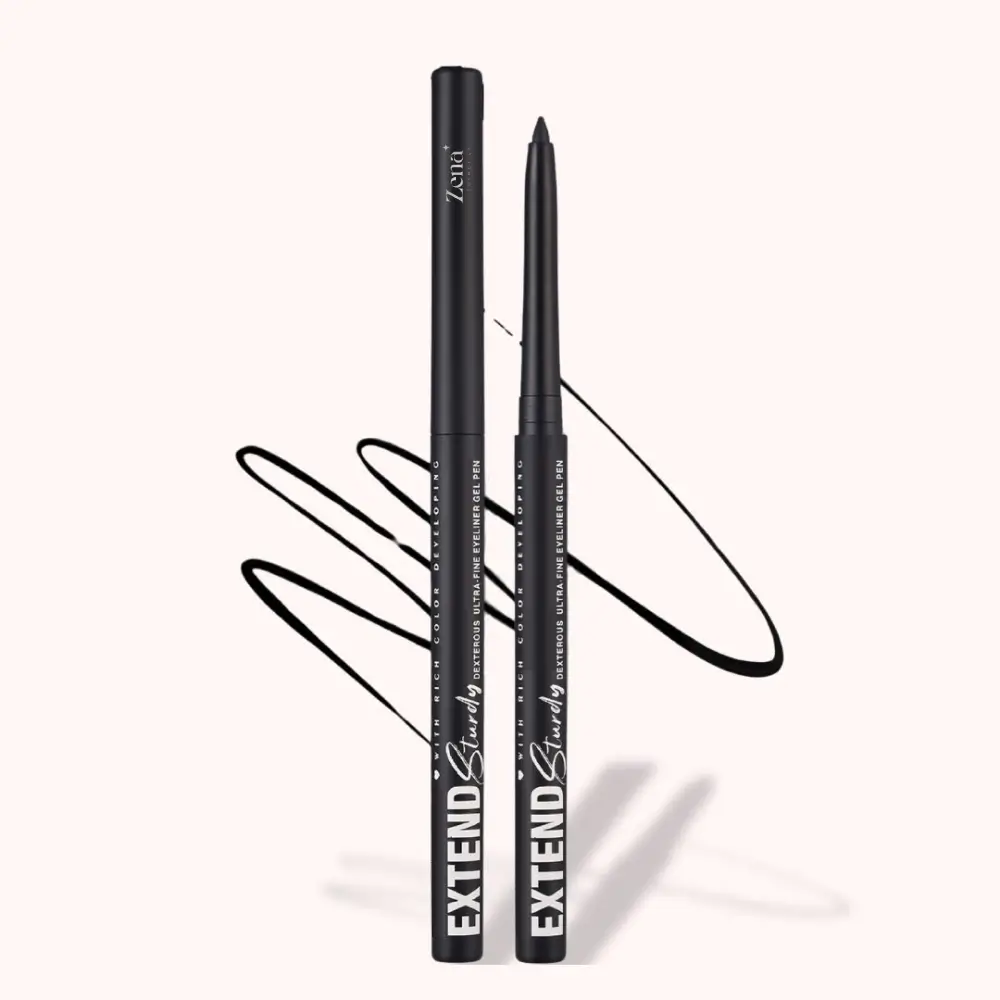
III. The Anatomy of a Perfect Gel Eyeliner Pen: Key Features to Look For
IV. Prepping for Perfection: Setting the Stage for Eyeliner Success
V. Techniques for the Eyeliner Novice (and the Seasoned Pro): From Basic Lines to Bold Wings
VI. Troubleshooting Eyeliner Disasters: Common Mistakes and How to Fix Them
VII. Maintaining Your Holy Grail: Storage, Cleaning, and Extending its Lifespan
VIII. Beyond Black: Exploring the Colorful World of Gel Eyeliner Pens
IX. The Final Verdict: Is the Long-wear Gel Eyeliner Pen REALLY Worth the Hype?
I. The Eyeliner Hall of Fame (and Shame): A Brief History of Eye Definition
Before we dive deep into the magic of gel eyeliner pens, let’s take a quick stroll down memory lane. Eyeliner, in its various forms, has been around for millennia.
- Ancient Egypt (4000 BC): We’re talking kohl, baby! This black powder, made from ground galena (lead sulfide), was used for both cosmetic and medicinal purposes. Think Cleopatra, but with potentially toxic levels of lead absorption. 💀
- Ancient Greece and Rome: Kohl continued to be popular, often mixed with other ingredients like soot and antimony. Eyeliner wasn’t just about beauty; it was also believed to ward off evil spirits.
- The Middle Ages: Eyeliner took a backseat for a while, considered a bit too… flashy. Beauty standards leaned towards pale skin and a more natural look.
- The Victorian Era: Eyeliner made a subtle comeback, often achieved with burnt matches or soot mixed with oil. Think subtle definition rather than bold statements.
- The Roaring Twenties: Boom! Eyeliner explodes back onto the scene, inspired by silent film stars like Clara Bow. Dark, dramatic eyes were all the rage. 💃
- The 1960s: Twiggy happened. Enough said. Thick, exaggerated eyeliner and multiple coats of mascara defined the era.
- The 1980s: Anything goes! From punk rock smudges to neon brights, eyeliner was a form of self-expression.
- The Present Day: We have a plethora of options! Liquid liners, pencil liners, gel liners, eyeshadow used as liner… the possibilities are endless. But today, we’re focusing on the glorious gel eyeliner pen.
The "Hall of Shame," of course, includes all the times we personally butchered our eyeliner looks throughout the ages. We’ve all been there! 😉
II. Why Gel Eyeliner Pens Reign Supreme: Understanding the Formulation & Delivery System
Okay, so why the gel eyeliner pen? Why not liquid, pencil, or even eyeshadow? Let’s break it down:
| Feature | Liquid Eyeliner | Pencil Eyeliner | Gel Eyeliner (Pot & Brush) | Gel Eyeliner Pen |
|---|---|---|---|---|
| Precision | High (with practice!) | Low to Medium | High (requires skill) | High (easier to control) |
| Color Payoff | Intense | Medium | Intense | Intense |
| Longevity | Can be long-wearing | Variable (often smudges) | Long-wearing | Long-wearing |
| Ease of Use | Steep learning curve | Beginner-friendly | Moderate learning curve | Beginner-friendly to Intermediate |
| Application | Prone to skipping & feathering | Can drag on the skin | Requires separate brush | Smooth, consistent application |
| Portability | Good | Excellent | Bulky (pot & brush) | Excellent |
The Magic of Gel: Gel eyeliner is essentially a pigment suspended in a gel-like base. This formulation gives it:
- Intense Color: Pigments are highly concentrated, resulting in rich, vibrant color payoff.
- Smooth Application: The gel glides effortlessly across the skin, minimizing tugging and skipping.
- Long-Wearing Power: Many gel formulas are designed to be waterproof, smudge-proof, and transfer-resistant.
The Power of the Pen: The pen delivery system solves the biggest problem with traditional gel eyeliner: the need for a separate brush and the potential for product contamination.
- Precise Control: The fine tip of the pen allows for incredibly precise lines, even for beginners.
- No Brush Required: Eliminates the need for extra tools and cleaning, making it perfect for travel and on-the-go touch-ups.
- Consistent Product Flow: The pen dispenses the perfect amount of product, preventing clumping and uneven application.
In short, the gel eyeliner pen combines the best of both worlds: the intense color and longevity of gel eyeliner with the ease and precision of a pen. 🏆
III. The Anatomy of a Perfect Gel Eyeliner Pen: Key Features to Look For
Not all gel eyeliner pens are created equal. To find your Holy Grail, you need to know what to look for:
- The Tip: This is arguably the most important feature.
- Fine Tip: Allows for ultra-thin lines and precise detailing.
- Flexible Tip: Conforms to the curve of your eye, making application smoother.
- Tapered Tip: Allows for both thin and thick lines, depending on the angle you hold the pen.
- Avoid: Tips that are too stiff, scratchy, or prone to fraying.
- The Formula:
- Highly Pigmented: Look for a pen that delivers intense color in a single swipe.
- Long-Wearing: Check reviews to see if it truly lasts all day without smudging or fading.
- Waterproof/Smudge-Proof: Ideal for oily eyelids or humid climates.
- Quick-Drying: Prevents transfer to the upper lid.
- Avoid: Formulas that are too dry, patchy, or contain irritating ingredients.
- The Pen Body:
- Comfortable Grip: A pen that’s easy to hold and control.
- Secure Cap: Prevents the formula from drying out.
- Durable Construction: You want a pen that can withstand being tossed around in your makeup bag.
- Ingredients:
- Hypoallergenic & Fragrance-Free: Especially important for sensitive eyes.
- Cruelty-Free: If that’s important to you, look for brands that don’t test on animals.
Table of Must-Have Features:
| Feature | Description | Why It Matters |
|---|---|---|
| Fine, Flexible Tip | Tapered or ultra-fine tip that bends slightly. | Allows for precise application, smooth lines, and comfortable use. |
| Intense Pigmentation | Rich, opaque color payoff in one stroke. | Ensures vibrant, defined lines that don’t require multiple layers. |
| Long-Wearing Formula | Waterproof, smudge-proof, and transfer-resistant. | Keeps your eyeliner looking flawless all day long, even in challenging conditions. |
| Comfortable Grip | Ergonomic design that fits comfortably in your hand. | Provides optimal control and reduces hand fatigue during application. |
| Secure Cap | Prevents the formula from drying out. | Extends the lifespan of your eyeliner pen. |
IV. Prepping for Perfection: Setting the Stage for Eyeliner Success
Before you even pick up your gel eyeliner pen, you need to prep your eyelids. This will ensure a smoother application and longer-lasting wear.
- Cleanse: Remove any oil, dirt, or makeup from your eyelids.
- Prime: Apply an eyelid primer to create a smooth canvas and prevent creasing. This is especially important for oily eyelids. A good primer will also help your eyeliner last longer.
- Set: Set the primer with a translucent powder. This will further absorb oil and create a more matte surface for the eyeliner to grip onto.
Think of it like painting a wall: you wouldn’t just slap paint on a dirty, uneven surface, would you? You’d clean it, prime it, and maybe even sand it down a bit first!
V. Techniques for the Eyeliner Novice (and the Seasoned Pro): From Basic Lines to Bold Wings
Now for the fun part! Let’s explore some different eyeliner techniques using your gel eyeliner pen:
- The Basic Line: This is the foundation for all other eyeliner looks.
- Start: Begin at the inner corner of your eye and draw a thin line along your lash line.
- Connect: Gradually thicken the line as you move towards the outer corner.
- Tips: Use short, feathery strokes rather than trying to draw one continuous line. Tilt your head back slightly for a better view of your lash line.
- The Winged Liner (Classic): The iconic look that everyone loves (and struggles with).
- Extend: Extend the line slightly past the outer corner of your eye, angling upwards towards the end of your eyebrow.
- Connect: Draw a line from the tip of the wing back to the lash line, creating a triangle.
- Fill: Fill in the triangle with eyeliner.
- Tips: Use tape or a business card as a guide for a sharp, even wing. Practice makes perfect! Don’t be afraid to experiment with different angles and lengths.
- The Tightline: A subtle way to define your eyes without visible eyeliner.
- Lift: Gently lift your upper eyelid.
- Apply: Apply the eyeliner to the upper waterline, filling in the gaps between your lashes.
- Tips: Use a gentle touch to avoid irritating your eyes. This technique can make your lashes look fuller and your eyes appear more awake.
- The Smudged Liner: A softer, more relaxed look.
- Apply: Apply a thick line of eyeliner along your lash line.
- Smudge: Use a small brush or your fingertip to smudge the line outwards, creating a smoky effect.
- Tips: Use a gel eyeliner that’s easy to blend. Set the smudged liner with a dark eyeshadow for longer-lasting wear.
Visual Guide to Eyeliner Styles:
| Eyeliner Style | Description | Difficulty | Best Suited For… |
|---|---|---|---|
| Basic Line | A thin line along the upper lash line. | Easy | Everyday wear, subtle definition. |
| Winged Liner | A line that extends past the outer corner of the eye and flicks upwards. | Medium | Special occasions, adding drama and definition. |
| Tightline | Eyeliner applied to the upper waterline, between the lashes. | Medium | Making lashes appear fuller, creating a subtle, natural look. |
| Smudged Liner | A soft, smoky line that’s blended outwards. | Easy | Creating a relaxed, edgy look, adding depth and dimension. |
| Double Winged Liner | Two winged liners on the upper and lower lash lines. | Hard | Dramatic, edgy looks for parties and special events. |
Remember: Eyeliner is all about experimentation! Don’t be afraid to try different techniques and find what works best for your eye shape and personal style.
VI. Troubleshooting Eyeliner Disasters: Common Mistakes and How to Fix Them
We’ve all been there. Eyeliner gone wrong. But fear not, here’s how to fix common eyeliner calamities:
- Uneven Wings:
- The Fix: Use a cotton swab dipped in makeup remover to clean up the edges and even out the wings. You can also use a small angled brush to apply concealer along the edges for a sharper look.
- Smudging:
- The Fix: Use a cotton swab to gently remove the smudged eyeliner. Apply a thin layer of translucent powder under your eyes to prevent further smudging.
- Skipping/Patchy Application:
- The Fix: Make sure your eyelid is properly primed and set. Apply a second layer of eyeliner to fill in any gaps. You can also try using a different gel eyeliner pen.
- Transfer to Upper Lid:
- The Fix: Use a quick-drying formula. Set your eyeliner with a translucent powder. Avoid applying too much product at once.
The Eyeliner Emergency Kit:
- Cotton Swabs: For cleaning up mistakes.
- Makeup Remover: For removing eyeliner entirely.
- Concealer: For creating sharp edges.
- Translucent Powder: For setting eyeliner and preventing smudging.
- Angled Brush: For precise application and cleanup.
VII. Maintaining Your Holy Grail: Storage, Cleaning, and Extending its Lifespan
Treat your gel eyeliner pen with respect, and it will reward you with flawless eyeliner for months to come.
- Storage: Store your pen horizontally or tip-down to prevent the formula from drying out. Keep it in a cool, dry place away from direct sunlight.
- Cleaning: Wipe the tip of the pen with a clean tissue after each use to remove any excess product. You can also use a cotton swab dipped in makeup remover to clean the tip more thoroughly.
- Extending Lifespan:
- Always close the cap tightly: This prevents the formula from drying out.
- Avoid pumping the pen excessively: This can introduce air into the pen and cause the formula to dry out.
- Store the pen upside down occasionally: This helps to keep the formula flowing towards the tip.
VIII. Beyond Black: Exploring the Colorful World of Gel Eyeliner Pens
While black eyeliner is a classic, don’t be afraid to experiment with other colors! Gel eyeliner pens come in a rainbow of shades, from bold blues and greens to shimmering golds and bronzes.
- Brown: A softer alternative to black, perfect for everyday wear.
- Navy Blue: Complements brown eyes beautifully.
- Green: Enhances green and hazel eyes.
- Purple: Adds a touch of mystery and sophistication.
- Gold/Bronze: Perfect for adding a touch of shimmer and sparkle.
Color Pairing Guide:
| Eye Color | Complementary Eyeliner Colors |
|---|---|
| Brown | Navy blue, purple, green, bronze, gold |
| Blue | Brown, copper, gold, peach |
| Green | Purple, brown, bronze, gold |
| Hazel | Green, purple, brown, gold, navy blue |
IX. The Final Verdict: Is the Long-wear Gel Eyeliner Pen REALLY Worth the Hype?
So, after all this, is the long-wear gel eyeliner pen truly the Holy Grail of eyeliner?
My answer: Absolutely!
For its ease of use, intense color payoff, long-wearing formula, and versatility, the gel eyeliner pen is a game-changer for both beginners and experienced eyeliner users. While there may be other great eyeliner options out there, the gel eyeliner pen consistently delivers exceptional results with minimal effort.
However, keep in mind:
- Practice is key: Even with the easiest-to-use product, mastering eyeliner takes time and patience.
- Find the right formula: Not all gel eyeliner pens are created equal. Experiment with different brands and formulas to find one that works best for you.
- Don’t be afraid to experiment: Eyeliner is a form of self-expression. Have fun with it!
Final Thoughts:
The long-wear gel eyeliner pen is a powerful tool that can transform your entire look. With a little practice and the right technique, you can achieve perfectly defined eyes that last all day long. So go forth, armed with your newfound knowledge, and conquer the eyeliner world!
Now go forth and create some eyeliner magic! ✨ Good luck, and may your wings always be even!
For detailed product specifications and purchases, please go to :https://zenamakeup.com/products/long-wear-precision-gel-eyeliner-pen
Leave a Reply